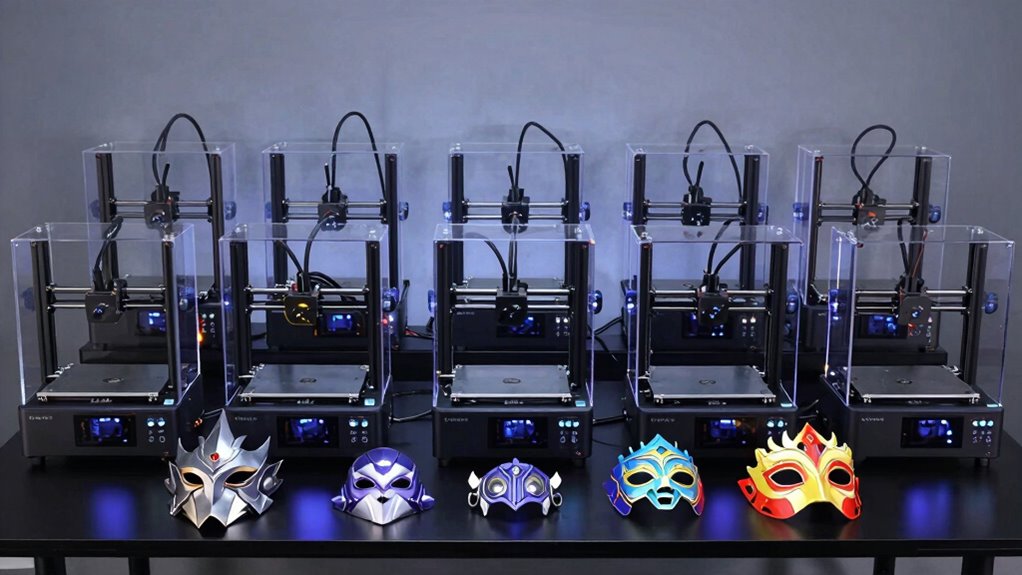
For most cosplay makers, I’d choose the Bambu Lab P1S Combo as the best overall 3D printer for cosplay props because its enclosed design and multicolor workflow suit detailed, repeatable builds. The Bambu Lab A1 is a simpler open-frame pick for large single-color parts, while the Phrozen Sonic Mini 8K S is better for small, finely detailed accessories. The main tradeoff is between build volume and ease of printing large pieces, color convenience, and the fine surface detail resin can capture. FDM printers generally make more practical prop shells, while resin suits small components and brings extra handling and cleanup. Read on for how the nine options compare and which one fits your costume-making priorities.

Get the latest gadgets delivered free — and shop member deals
- Fast, free delivery on millions of items
- Access to Prime Big Deal Days deals on October 6–7
- Prime Video, Amazon Music and more included
Complete the kit


Key Takeaways
- The P1S Combo leads as the most balanced pick: its enclosure and included multicolor setup support varied prop projects, though large armor pieces may still need to be split into sections.
- The A1 is the straightforward choice for large, single-color FDM parts: it avoids the added complexity of an enclosed multicolor setup, but offers less flexibility for color changes.
- Resin detail comes with a different workflow: the Phrozen Sonic Mini 8K S can suit small, intricate pieces, while its build area and resin handling make it a poor match for full-size props.
- Multicolor systems serve different needs: the Snapmaker U1 uses four toolheads, while the AD5X, K2 SE 4C, and SparkX i7 Nano Combo offer alternate color workflows; color capability alone does not decide which is best for large costume parts.
- Entry-level simplicity and room to grow can pull in opposite directions: the Ender 3 V3 SE is a more basic starting point, while enclosed and multicolor models offer more features with added setup and workflow considerations.
| Bambu Lab A1 FDM 3D Printer |  | Best for Beginners | Printing technology: FDM | Maximum acceleration: 10,000 mm/s² | Calibration: Automatic, including Z-offset and bed leveling | VIEW ON AMAZON | See Our Full Breakdown |
| FLASHFORGE AD5M CoreXY 3D Printer |  | Best for Fast Single-Color Builds | Printer type: CoreXY 3D printer | Maximum printing speed: 600 mm/s | Build volume: 220 × 220 × 220 mm | VIEW ON AMAZON | See Our Full Breakdown |
| Creality SPARKX i7 Nano Combo Multi-Color 3D Printer |  | Best for Hands-Off Multicolor Props | Product type: 3D printer | Color printing: Up to 4 colors | Build volume: 260 × 260 × 255 mm | VIEW ON AMAZON | See Our Full Breakdown |
| Phrozen Sonic Mini 8K S Resin 3D Printer |  | Best for Fine Costume Details | Display: 7.1-inch monochrome LCD | XY resolution: 22 microns | Build volume: 16.5 × 7.2 × 17 cm (6.5 × 2.8 × 6.7 inches) | VIEW ON AMAZON | See Our Full Breakdown |
| Bambu Lab P1S Combo 3D Printer with AMS |  | Best for Advanced Materials and Multicolor | Model: P1S Combo | Included: P1S 3D printer and AMS | Maximum colors: Up to 16 with AMS | VIEW ON AMAZON | See Our Full Breakdown |
| Creality Ender 3 V3 SE 3D Printer |  | Best for Cosplay Beginners | Maximum print speed: 250 mm/s | Acceleration: 2500 mm/s² | Extruder: Sprite direct drive | VIEW ON AMAZON | See Our Full Breakdown |
| Snapmaker U1 3D Printer with Four Toolheads |  | Best for Multi-Material Cosplay Props | Toolheads: 4 | Tool change time: 5 seconds | Maximum print speed: 500 mm/s | VIEW ON AMAZON | See Our Full Breakdown |
| Creality K2 SE 4C Multicolor 3D Printer |  | Best for Four-Color FDM Props | Printing colors: 4 | Print speed: Up to 500 mm/s | Acceleration: 20,000 mm/s² | VIEW ON AMAZON | See Our Full Breakdown |
| FLASHFORGE AD5X Multi-Color CoreXY 3D Printer | 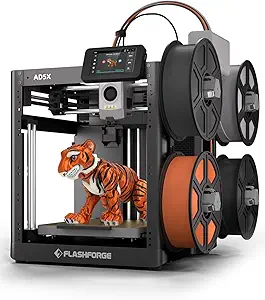 | Best for Fast Multicolor Prints | Printer type: CoreXY 3D printer | Build volume: 220 × 220 × 220 mm | Maximum print speed: 600 mm/s | VIEW ON AMAZON | See Our Full Breakdown |
| 3d printers for cosplay prop | Build volume |
|---|---|
| Bambu Lab A1 FDM 3D Printer | — |
| FLASHFORGE AD5M CoreXY 3D Prin | 220 × 220 × 220 mm |
| Creality SPARKX i7 Nano Combo | 260 × 260 × 255 mm |
| Phrozen Sonic Mini 8K S Resin | 16.5 × 7.2 × 17 cm (6.5 × 2.8 × 6.7 inches) |
| Bambu Lab P1S Combo 3D Printer | — |
| Creality Ender 3 V3 SE 3D Prin | — |
| Snapmaker U1 3D Printer with F | 270 × 270 × 270 mm |
| Creality K2 SE 4C Multicolor 3 | — |
| FLASHFORGE AD5X Multi-Color Co | 220 × 220 × 220 mm |
More Details on Our Top Picks
Bambu Lab A1 FDM 3D Printer
The Bambu Lab A1 is a practical starting point for cosplay makers who want to focus on shaping and finishing props instead of tuning a printer. Automatic bed leveling and Z-offset calibration reduce setup work, while active flow rate compensation helps keep extrusion consistent across larger parts. Its stated acceleration of 10,000 mm/s² supports quicker printing, though cosplay helmets and armor can still take substantial time. Compared with the enclosed Bambu Lab P1S Combo, the A1 has less support for advanced materials; multicolor printing also requires a separately purchased AMS lite. That makes it a simpler fit for PLA prop parts than a ready-made multicolor setup. Its quick-swap nozzle is useful when changing print jobs, but the AMS lite adds cost and equipment if color changes matter to your designs.
Pros:- Automatic bed leveling and Z-offset calibration reduce setup adjustments.
- Active flow rate compensation supports consistent extrusion on prop parts.
- Quick-swap nozzle makes changing nozzle setups simpler.
- Active motor noise canceling supports quieter operation, with a stated noise level of ≤48 dB.
Cons:- Multicolor printing requires the separately sold AMS lite.
- Unlike the enclosed P1S Combo, it is not presented as a printer for advanced filaments such as ABS and ASA.
Best for: New cosplay makers printing mostly PLA parts who want automatic calibration and straightforward setup.
Not ideal for: Makers who need an enclosure for frequent ABS or ASA printing, or who want multicolor printing without buying a separate AMS lite.
- Printing technology:FDM
- Maximum acceleration:10,000 mm/s²
- Calibration:Automatic, including Z-offset and bed leveling
- Multicolor printing:Supported with separately sold AMS lite
- Nozzle:1-Clip quick-swap
- Noise level:≤48 dB
- Dimensions:21.76 × 20.83 × 12.87 inches
- Weight:22 pounds
Our verdict“Choose the A1 if you want an approachable printer for mostly single-color PLA cosplay parts and value automated setup.”
FLASHFORGE AD5M CoreXY 3D Printer
The FLASHFORGE AD5M suits cosplay makers who want a speed-focused CoreXY printer for parts that do not need multicolor output. Its listed maximum speed of 600 mm/s and automatic calibration can help move from setup to printing quickly, while the quick-swap nozzle offers flexibility across jobs. The 220 × 220 × 220 mm build volume fits many costume details, but large helmets or broad armor panels may need to be split into pieces. Compared with the Creality SPARKX i7 Nano Combo, the AD5M has no listed automatic multicolor or backup-spool features; the Creality’s larger build volume better suits some bigger prints. The AD5M’s customizable enclosure adds flexibility, though the supplied product details do not establish which materials it supports or how the enclosure affects them.
Pros:- Listed maximum printing speed of 600 mm/s.
- Automatic calibration cuts down on manual setup.
- Quick-swap 3S nozzle supports simpler nozzle changes.
- Customizable enclosure allows some configuration to suit the workspace.
Cons:- The 220 mm cubic build volume may require large props to be split into more sections.
- Multicolor printing and automatic backup-spool switching are not listed features.
Best for: Cosplay builders prioritizing quick single-color prints for segmented armor, accessories, and prop details.
Not ideal for: Makers who want automatic multicolor output or need enough build space to print large costume pieces in fewer sections.
- Printer type:CoreXY 3D printer
- Maximum printing speed:600 mm/s
- Build volume:220 × 220 × 220 mm
- Calibration:Automatic
- Nozzle:Quick-swap, 3S
- Enclosure:Customizable
- Included filament:50 g HS PLA
Our verdict“Pick the AD5M if speed and automatic calibration matter more to your cosplay workflow than multicolor printing or a larger build volume.”
Creality SPARKX i7 Nano Combo Multi-Color 3D Printer
The Creality SPARKX i7 Nano Combo is the clearest fit here for builders who want costume accents printed in multiple colors without painting every detail afterward. It supports up to four colors, and its filament system can detect feed problems and switch to a matching backup spool when the active one runs out. That may reduce interruptions during longer prop jobs. Its 260 × 260 × 255 mm build volume is roomier than the FLASHFORGE AD5M’s, giving you more scope for larger sections, though it still may not fit a full helmet in one print. Compared with the Bambu Lab A1, multicolor capability is built into this combo’s described workflow rather than requiring a separately sold AMS lite. The tradeoff is the four-color limit, and backup switching requires a matching spool.
Pros:- Supports automatic printing with up to four colors.
- 260 × 260 × 255 mm build volume exceeds the AD5M’s listed dimensions.
- Can switch to a matching backup spool when filament runs out.
- Detects filament breakage, tangling, and empty feed.
Cons:- Multicolor printing is limited to four colors.
- Automatic backup switching requires a matching filament spool.
- The listed build volume may still require large costume pieces to be divided into sections.
Best for: Cosplay makers who want multicolor costume details and automatic filament monitoring during longer prints.
Not ideal for: Builders who need more than four colors in one print or cannot keep matching backup filament spools on hand.
- Product type:3D printer
- Color printing:Up to 4 colors
- Build volume:260 × 260 × 255 mm
- Filament features:Automatic refill, feed, and retract
- Filament monitoring:Detects breakage, tangling, and empty feed
- Backup spool:Switching requires a matching filament spool
- Brand:Creality
Our verdict“Choose the SPARKX i7 Nano Combo if automated four-color printing and filament monitoring matter more than unrestricted color count.”
Phrozen Sonic Mini 8K S Resin 3D Printer
The Phrozen Sonic Mini 8K S serves a different cosplay need from the FDM machines here: its 22-micron XY resolution is suited to small, intricate pieces such as emblems, jewelry, and miniature accessories. That detail advantage does not make it the natural choice for full helmets or armor; its build volume is only 16.5 × 7.2 × 17 cm, far smaller than the Creality SPARKX i7 Nano Combo. Resin printing also brings more handling and cleanup than the filament workflow of the Bambu Lab A1, a meaningful cost in time when producing many costume parts. Support for Lychee, Chitubox, and Tango gives users several slicer options, and precise Z-axis calibration supports accurate setup. I would choose it as a detail-focused companion machine, not as the sole printer for large props.
Pros:- 22-micron XY resolution supports fine detail on small pieces.
- Compatible with Lychee, Chitubox, and Tango slicers.
- Precise Z-axis calibration supports accurate setup.
- Compact printer dimensions suit a dedicated small-part workspace.
Cons:- The 16.5 × 7.2 × 17 cm build volume limits the size of props it can produce.
- Resin printing may require more setup and handling than the FDM options.
- It is a less practical choice than the A1 for producing larger costume parts.
Best for: Cosplay makers producing small, high-detail emblems, miniature props, and decorative accessories.
Not ideal for: Builders printing large armor panels or seeking a low-handling, filament-based workflow for full-size props.
- Display:7.1-inch monochrome LCD
- XY resolution:22 microns
- Build volume:16.5 × 7.2 × 17 cm (6.5 × 2.8 × 6.7 inches)
- Item dimensions:11.4 × 11.4 × 16.9 inches
- Item weight:22 pounds
- Compatible slicers:Lychee, Chitubox, Tango
- Model number:SOMIN8KSUS
Our verdict“Pick the Sonic Mini 8K S for fine detail on small cosplay pieces, and look to an FDM printer for larger costume builds.”
Bambu Lab P1S Combo 3D Printer with AMS
The Bambu Lab P1S Combo is the most versatile choice in this group for cosplay makers who expect to print across materials as well as colors. Its enclosure and listed filament range, including ABS and ASA, set it apart from the A1, while the included AMS supports up to 16 colors for decorative parts. Automatic bed leveling and a stated setup time of about 15 minutes keep those capabilities more accessible. The tradeoff is a heavier, more involved setup at 47.5 pounds, and the product data advises against carbon- or glass-fiber-reinforced polymer. Compared with the Creality SPARKX i7 Nano Combo, the P1S Combo offers a higher stated color capacity and broader listed filament range; the Creality has a larger stated build volume. Pick the P1S for material flexibility, not maximum part size.
Pros:- Enclosed design and listed support for ABS and ASA broaden material options.
- Included AMS supports up to 16 colors.
- Automatic bed leveling reduces setup adjustments.
- Stated maximum speed of 500 mm/s and acceleration of 20,000 mm/s².
Cons:- The 47.5-pound weight makes repositioning more difficult than with the 22-pound A1.
- Carbon- and glass-fiber-reinforced polymers are not recommended.
- Its listed dimensions do not establish a build volume, so buyers cannot compare part capacity from the supplied specs.
Best for: Experienced cosplay builders who want an enclosed printer for ABS or ASA parts and multicolor finishing options.
Not ideal for: Makers who need a larger build volume, plan to print carbon- or glass-fiber-reinforced filament, or prefer a lightweight setup.
- Model:P1S Combo
- Included:P1S 3D printer and AMS
- Maximum colors:Up to 16 with AMS
- Maximum printing speed:500 mm/s
- Acceleration:20,000 mm/s²
- Design:Enclosed
- Bed leveling:Automatic
- Ideal filaments:PLA, PETG, TPU, PVA, PET, ABS, ASA; also capable of PA and PC
- Dimensions and weight:15.31 × 18.03 × 15.31 inches; 47.5 pounds
Our verdict“Choose the P1S Combo if an enclosure, advanced filament options, and high-capacity multicolor printing matter more than easy portability.”
Creality Ender 3 V3 SE 3D Printer
The Ender 3 V3 SE is the practical starting point for makers who want to print armor details, costume fittings, and prop parts without adding multicolor setup to the learning curve. Auto leveling and automatic Z-offset calibration reduce bed setup work, while the flexible plate helps release finished pieces. Its Sprite direct drive extruder handles PLA, PETG, and TPU, giving you options for rigid prop shells and more flexible components. Compared with the multicolor FLASHFORGE AD5X, it is simpler and supports fewer colors, but that keeps the workflow focused on dependable single-color parts. The 250 mm/s maximum speed is useful for routine prints, though consistent results depend on recommended settings and compatible materials. Choose it for accessible fundamentals; skip it if you want color changes handled automatically.
Pros:- Auto leveling and automatic Z-offset calibration simplify first-layer setup
- Direct drive extruder supports PLA, PETG, and TPU
- Flexible spring steel plate helps remove finished prints
- Easy assembly lowers the setup burden for new users
Cons:- No built-in multicolor printing
- Consistent performance depends on using recommended settings and compatible materials
Best for: First-time cosplay makers printing mostly single-color armor pieces, fittings, and prop components who want automated bed setup.
Not ideal for: Makers who want multicolor props in one print or need a larger build area for oversized costume parts.
- Maximum print speed:250 mm/s
- Acceleration:2500 mm/s²
- Extruder:Sprite direct drive
- Auto leveling:CR Touch with automatic Z-offset calibration
- Build plate:Flexible PC spring steel
- Supported materials:PLA, PETG, TPU
- Dimensions:15 × 19.6 × 15 inches
- Weight:19.8 pounds
Our verdict“Choose the Ender 3 V3 SE to learn FDM printing and make single-color cosplay parts with less setup effort.”
Snapmaker U1 3D Printer with Four Toolheads
For props that combine visible colors or materials, the Snapmaker U1’s four independent toolheads offer a different approach from single-nozzle color systems: a five-second tool change can reduce the time and filament spent on swaps. That can help with detailed accessories, emblems, and multicolor costume pieces that would otherwise need painting or assembly. Its 270 × 270 × 270 mm build volume also gives it more room than the FLASHFORGE AD5X’s 220 mm cubed space for larger components. The advertised 500 mm/s speed and broad material support add flexibility, though maximum speed will vary by material and print. At 59 pounds, it is a substantial machine that needs a stable, dedicated spot. Pick it for multi-material capability, not portability.
Pros:- Four independent toolheads support multi-color and multi-material prints
- Five-second tool changes can reduce filament waste and color-swap time
- 270 mm cubed build volume accommodates larger costume components
- Automatic calibration and filament management simplify operation
Cons:- At 59 pounds, it is difficult to move and needs a substantial setup area
- Advertised maximum speed may not apply to every material or print
Best for: Cosplay makers producing multicolor or mixed-material accessories and who have a permanent, sturdy place for a larger printer.
Not ideal for: Apartment makers with limited space, or beginners who only need straightforward single-color prop parts.
- Toolheads:4
- Tool change time:5 seconds
- Maximum print speed:500 mm/s
- Build volume:270 × 270 × 270 mm
- Supported materials:PLA, PVA, TPU, PETG, PCTG, ABS, ASA, PA, PC, and more
- Display:3.5-inch touchscreen
- Dimensions:22.6 × 13 × 14.2 inches
- Item weight:59 pounds
Our verdict“Choose the Snapmaker U1 when multi-material prop details and a larger build volume matter more than compactness.”
Creality K2 SE 4C Multicolor 3D Printer
The Creality K2 SE 4C suits makers who want four-color output and fast CoreXY motion without the four independent toolheads of the Snapmaker U1. Its automatic bed leveling, filament runout and tangle detection, and power-loss recovery help manage long prop prints, where a failed job can cost substantial time. Offline USB printing and the listed Creality OS, Fluidd UI, and root access also give hands-on users more control over the machine. The tradeoff is material range: the listed support is limited to PLA and PETG, while the Snapmaker U1 lists a much broader set. That narrows choices for cosplay pieces needing other materials. Consider this model for colorful FDM parts in its supported filaments; check the build-volume data before planning large armor sections.
Pros:- Four-color printing supports multicolor prop details
- CoreXY system lists speeds up to 500 mm/s
- Automatic bed leveling reduces manual setup
- Runout detection and power-loss recovery help protect long prints
Cons:- Listed material support is limited to PLA and PETG
- Multicolor printing may need more space than single-color printing
Best for: Cosplay makers who want four-color PLA or PETG parts, fast CoreXY printing, and recovery features for long jobs.
Not ideal for: Makers who need flexible or engineering materials, or who want a stated build volume before sizing large costume pieces.
- Printing colors:4
- Print speed:Up to 500 mm/s
- Acceleration:20,000 mm/s²
- Motion system:CoreXY
- Bed leveling:Automatic
- Supported materials:PLA, PETG
- Connectivity:Offline USB printing
- Software features:Creality OS, Fluidd UI, root access
Our verdict“Pick the K2 SE 4C for four-color cosplay parts in PLA or PETG, provided its listed material range fits your projects.”
FLASHFORGE AD5X Multi-Color CoreXY 3D Printer
Among these four options, the FLASHFORGE AD5X lists the highest maximum speed, at 600 mm/s, and pairs it with up to four-color printing. For makers turning out batches of costume accents or colorful prop shells, automatic filament feeding and retraction, vibration compensation, and print recovery are aimed at reducing hands-on interruptions. One-click bed leveling also makes setup less of a project than on a basic manual machine. Against the Creality K2 SE 4C, it adds a stated 300°C direct-drive extruder and nozzle choices from 0.25 to 0.8 mm, which offer more control over detail and throughput. Its 220 mm cubed build volume can constrain larger pieces, and the speed figure is a maximum rather than a guarantee for every print. It fits compact, colorful parts better than oversized armor.
Pros:- Supports up to four colors for decorative prop details
- 600 mm/s listed maximum speed and 20,000 mm/s² acceleration
- One-click bed leveling and automatic filament handling reduce routine tasks
- Nozzle options from 0.25 to 0.8 mm let users tune detail or throughput
Cons:- 220 mm cubed build volume may require splitting larger costume parts
- Specialized tasks may call for optional nozzle upgrades
Best for: Experienced cosplay makers printing batches of compact, multicolor parts who value speed, filament automation, and nozzle flexibility.
Not ideal for: Makers printing large armor panels or those who need a confirmed material list for specialized filament choices.
- Printer type:CoreXY 3D printer
- Build volume:220 × 220 × 220 mm
- Maximum print speed:600 mm/s
- Maximum acceleration:20,000 mm/s²
- Maximum extruder temperature:300°C
- Color support:Up to 4 colors
- Nozzle sizes:0.25 mm, 0.4 mm, 0.6 mm, 0.8 mm
- Bed leveling:One-click automatic leveling
Our verdict“Choose the AD5X for fast, multicolor cosplay accessories that fit within its 220 mm cubed build volume.”

How We Picked
I ranked these printers around the jobs cosplay makers actually face: producing wearable-scale shells, splitting and joining oversized parts, capturing small decorative details, and getting repeatable results across a build. I weighed build format and usable volume, setup demands, enclosure and material flexibility, color workflow, and the practical work required after a print. An FDM printer generally earns more weight for helmets, armor panels, and staff components; a compact resin printer can still rank well for badges, jewelry, and other fine details.
The P1S Combo ranks first for its broad balance of enclosure, versatility, and multicolor capability. The A1 and AD5M offer a simpler route for mostly single-color builds, while the Phrozen fills a narrower detail-focused role. The remaining multicolor and toolhead models are distinguished by their approaches to color and workflow, and the Ender 3 V3 SE is judged as a more basic entry point. I considered meaningful drawbacks for every option, including size limits, added workflow complexity, or a narrower use case.
Factors to Consider When Choosing 3d Printers For Cosplay Props
Before choosing a printer, I’d map out the largest prop parts you expect to print and how much finishing work you are willing to do. A spec sheet can make a machine look capable while concealing the time spent splitting, assembling, sanding, priming, and painting costume pieces.
Match Build Volume to the Largest Prop
Measure the largest part you hope to print, including its orientation on the build plate. A helmet shell may fit only when tilted, and that can add supports or affect surface quality. Many cosplay builds can be split into panels, but every seam adds alignment and finishing work. Plan for connection features such as tabs, pins, or screw points before slicing the model. A larger printer can reduce the number of joins, but it also takes more workspace and does not remove the need to check fit. If you only make small accessories, a compact printer may leave more room for careful detail work.
Choose FDM or Resin for the Parts You Make
FDM is usually the practical starting point for large prop shells because filament parts can be printed in sections and assembled into sizable forms. Layer lines need sanding or filler primer when you want a smooth painted finish, so factor that labor into your plans. Resin can preserve fine sculpted details on small accessories, but its smaller build area often makes it unsuitable for wearable-scale parts. Resin also involves washing, curing, and handling uncured material carefully. Some makers benefit from both types of printer, but maintaining two workflows adds equipment and space needs. Choose based on your most common print, not the most intricate model in your folder.
Treat Multicolor as a Workflow Choice
Multicolor printing can add visible color accents directly to a prop, which helps when a design calls for distinct panels or repeated patterns. It also changes how you prepare jobs and manage filament, and color swaps can add print time and material use. For props intended to be sanded and painted, the extra color capability may contribute little to the final result. Toolhead-based and filament-switching systems also handle color changes differently, so compare the workflow rather than counting colors alone. A single-color printer can be the more direct choice when your plan already includes primer and paint. Pay for multicolor features when they support a specific finish you expect to keep.
Account for Assembly and Surface Finishing
A printer produces parts; it does not complete the prop. Large pieces often need trimming, seam filling, sanding, and a suitable finish before they look ready for a costume. Designs with keyed joins or alignment pins can make assembly more manageable, so check the model files you plan to use before buying. Support placement also matters because scars on a visible surface can mean more repair work. Consider whether you have a ventilated area, tools, and a work surface for finishing alongside space for the printer. A machine that prints a prop quickly may still leave many hours of post-processing.
Weigh Enclosure, Materials, and Workspace
An enclosure can help contain drafts and may give you more flexibility with certain filaments, but it also takes up space and can add heat around the machine. Check the materials you intend to use and the printer’s stated limits rather than assuming every enclosed model handles every filament. For common cosplay parts, material choice should reflect the part’s shape, finish, and expected use. A printer with a small footprint can be easier to place, but the spool path and access for maintenance also need room. Think about noise and ventilation where you plan to work. The right setup is the one that fits your space and routine as well as your prop designs.
Prioritize the Workflow You Can Maintain
Features matter only when they suit the time and attention you can give the printer. Automatic setup aids can reduce some manual steps, while a more basic machine may ask you to learn more about calibration and troubleshooting. Multicolor mechanisms add another set of parts and job settings to understand. Before deciding, look at how replacement parts, maintenance instructions, and slicer guidance are presented for your shortlisted models. If a convention deadline is driving the purchase, a familiar, repeatable workflow may serve you better than extra features you have not yet learned. Leave time for test prints before committing a full costume build to any new machine.
Frequently Asked Questions
Should I get an FDM or resin printer for a cosplay helmet?
I’d start with FDM for a helmet because its build format is generally better suited to printing a shell in large sections. Resin is more useful when small sculpted details matter more than overall size, and a helmet-sized model may require many sections on a compact resin machine. FDM layer lines can add sanding and priming work, so include finishing time in your schedule. If your helmet has tiny emblems or greebles, those can be printed separately in resin or FDM at a smaller scale. Pick the process around the shell first, then decide how to handle the decorative pieces.
Is multicolor printing worthwhile if I plan to paint my props?
It may not be worthwhile for props that will be fully primed and painted, since those steps cover the printed filament colors. Multicolor can help when you want visible color divisions straight from the printer or need repeated accents without hand-painting each part. It can also add workflow steps and print time, so weigh that against the finishing it saves. A single-color printer is often enough for a paint-first build. Decide based on the final surface you want, rather than the number of colors a machine can print.
Can one printer handle both armor panels and small decorative parts?
An FDM printer can make armor panels and many small accessories, especially when the decorative shapes do not require very fine detail. The tradeoff is that small features may show more visible layer structure than they would on a resin print. A compact resin printer can capture tiny details but is a weaker fit for large panels. Some makers print shells in FDM and add separate detailed pieces later, keeping each process suited to its task. If you want one machine, prioritize the part type that takes up most of your build time.
How much should I worry about print volume if I can split the model?
Splitting a model can make a smaller build area workable, but it moves effort into alignment, joining, and seam repair. For a smooth armor surface, poorly placed seams may be more work than the extra print time saved. Check whether your model includes deliberate cut lines and joining features before assuming it will divide cleanly. Parts with hidden seams or layered panel designs are often easier to assemble than broad, uninterrupted surfaces. If you expect to print large props often, build volume can reduce repeated assembly work.
What should a beginner prioritize over extra printer features?
I’d prioritize a workflow that is easy to set up, repeat, and troubleshoot, along with a printer size that fits the parts you actually plan to make. Extra toolheads or color systems can be useful, but they also add settings and maintenance tasks to learn. Begin with a small test part that resembles your planned prop material and finish it through sanding and priming. That reveals how much post-processing your designs require before you commit to a full costume build. A manageable first project is a better guide to your needs than a long feature list.
Conclusion
For one printer to cover the widest range of cosplay work, I’d choose the Bambu Lab P1S Combo as best overall, while checking that its build volume suits the largest parts in your plans. The Bambu Lab A1 is my best value-style pick for makers focused on straightforward, mostly single-color FDM props, and the Creality Ender 3 V3 SE is the basic beginner option for someone ready to learn a more hands-on workflow. For a premium multicolor setup, I’d compare the Snapmaker U1 with the P1S Combo based on whether its four-toolhead approach fits your needs. For fine small accessories, choose the Phrozen Sonic Mini 8K S; for multicolor FDM alternatives, compare the AD5X, K2 SE 4C, and SparkX i7 Nano Combo by their workflow and size fit. Your best match is the printer suited to the parts you make most, not the one with the longest feature list.
Fall Picks
fall essentials
As an affiliate, we earn on qualifying purchases.