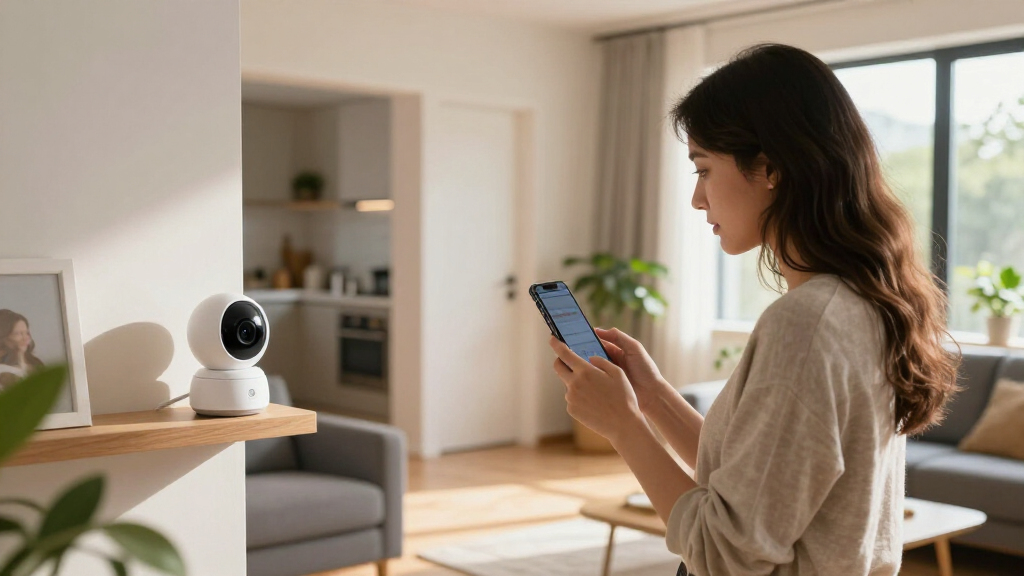
This guide walks you through the complete process of installing and setting up smart home security cameras: choosing mounting locations, physically installing the cameras, connecting them to your Wi-Fi network and mobile app, and configuring motion alerts and recording so the system actually works when you need it. By the end, you will have working cameras that stream live video to your phone, record motion events, and notify you of activity at your home.

Get the latest gadgets delivered free — and shop member deals
- Fast, free delivery on millions of items
- Access to Prime Big Deal Days deals on October 6–7
- Prime Video, Amazon Music and more included

Reolink 8-Channel 4K Security Camera System with PT Auto-Tracking
- ✔ Channels: 8
- ✔ Video resolution: 8MP (3840 × 2160)
- ✔ Included cameras: 4 PoE cameras

Hiseeu 12MP PoE Security Camera System with 8 Cameras
- ✔ Camera count: 8
- ✔ NVR channels: 16
- ✔ Video resolution: 12MP

Blink Outdoor 4 Wireless Security Camera System, 5 Cameras with Sync Module Core
- ✔ Camera resolution: 1080p HD
- ✔ Field of view: 143° diagonal
- ✔ Included cameras: 5 Outdoor 4 cameras
This guide is written for beginners with no prior smart home experience. It applies to mainstream consumer cameras from brands such as Ring, Nest, Wyze, Eufy, Blink, Arlo, and TP-Link Tapo, whether wired, plug-in, or battery-powered. Outdoor camera installation is covered, including basic ladder and drilling work. If you are uncomfortable drilling into exterior walls or working on a ladder, enlist help for those steps. Expect the process to take one to three hours depending on how many cameras you install and how complex the mounting is.
Difficulty: Beginner | Time: 1-3 hours (varies with number of cameras and mounting difficulty)
What You’ll Need
Tools & Materials:
- Smart security cameras (charged or with batteries inserted)
- Drill with masonry and wood bits (for wall mounting)
- Screwdriver (usually Phillips; most kits include one)
- Sturdy ladder for outdoor or ceiling mounting
- Smartphone running the camera manufacturer’s app
- Reliable Wi-Fi network with the password available
- Pencil for marking drill holes
- Optional: silicone sealant for outdoor cable entry points
- Optional: microSD card or cloud subscription for recording storage
Knowledge:
- How to connect a device to Wi-Fi using a smartphone app
- How to use a drill and ladder safely
- Basic familiarity with your home’s Wi-Fi router location and network name (SSID)
Before starting, confirm three things. First, verify your Wi-Fi reaches the camera locations — most cameras need at least two or three bars of signal, and many budget models only support 2.4 GHz networks, not 5 GHz. Second, charge battery-powered cameras fully or keep plug-in cameras within reach of an outlet. Third, decide where recorded footage will be stored: locally on a microSD card or hub, or in the cloud via a paid subscription. Some cameras are nearly useless for recording without a subscription or card, so make this choice before installation day, not after.
If you rent your home or want to avoid drilling, most cameras also support adhesive mounts or shelf placement, which works fine indoors.
Reolink 8-Channel 4K Security Camera System with PT Auto-Tracking
The Reolink 8-Channel 4K system takes our top spot because it solves the biggest weakness of fixed security cameras: blind spots. Each of the four included cameras pans 355° and tilts 50°, with automatic motion tracking that follows a person or vehicle across your property. In practice, four moving cameras can cover what fixed-lens kits like the Hiseeu need six or eight cameras to watch, and the 2TB local hard drive means your footage stays in your house — no subscription, no monthly fees, and room to expand to 16TB.Detection is where this system pulls ahead of the Blink Outdoor 4. Reolink’s person, vehicle, and animal classification is built into the hardware, while Blink locks person detection behind a paid plan. Color and infrared night vision out to 100 feet also means the 4K detail holds up after dark, which matters if you ever need to hand footage to police or an insurer. Two-way talk adds a deterrent option the Hiseeu system only partially matches.The tradeoff is installation. Every camera requires a wired PoE Ethernet run back to the NVR, so plan on drilling, cable fishing, or conduits. Compared with Blink’s five-minute battery mounts, this is a weekend project, not an afternoon one. The NVR’s 2TB drive also fills faster with 24/7 4K recording than the description’s 16TB maximum might suggest — budget for an upgrade if you record continuously. Still, for homeowners who want forensic-grade footage and zero recurring costs, this is the most complete package here.
Pros:
- 4K video with both color and infrared night vision out to 100 feet
- Automatic pan-and-tilt tracking lets four cameras cover more area than fixed-lens kits
- Person, vehicle, and animal detection built in, with no subscription required
- 2TB local storage with 24/7, scheduled, or motion recording and expansion to 16TB
Cons:
- Wired PoE installation requires an Ethernet cable run to every camera
- Included 2TB drive may need upgrading for continuous 4K recording
Best for: Homeowners who want 4K evidence-grade footage, auto-tracking coverage, and subscription-free local recording
Not ideal for: Renters or anyone unwilling to run Ethernet cables through walls
Bottom line: The most capable all-around system here, pairing auto-tracking 4K cameras with genuinely subscription-free local storage.
“The most capable all-around system here, pairing auto-tracking 4K cameras with genuinely subscription-free local storage.”
Hiseeu 12MP PoE Security Camera System with 8 Cameras
If your priority is blanketing every corner of a large property, the Hiseeu 12MP system delivers sheer coverage no other option here matches: eight cameras and a 16-channel NVR in a single package. At 12MP with a 121° wide-angle lens, each fixed camera captures more detail per frame than the Reolink’s 4K output, and at 30 fps the footage stays smooth enough to catch fast-moving subjects. Where Reolink covers ground with four moving cameras, Hiseeu does it with eight static ones — a different philosophy that suits properties where you already know exactly which zones need watching.The 16-channel NVR is the real long-term play. You get eight cameras today and headroom for eight more, though going beyond the included eight requires buying your own PoE switch, which is not in the box — a hidden cost worth factoring in. Human and vehicle detection with app alerts, two-way audio, and three night vision modes (color, spotlight alarm, and black-and-white) give it more flexibility after dark than the Blink’s infrared-only view.Two caveats temper the value. First, the listing is inconsistent about storage — the description says 4TB while the specifications say 3TB — so confirm the drive size before purchase and plan on expansion for eight-camera continuous recording. Second, fixed cameras cannot track a subject the way the Reolink can, so an intruder moving between zones generates several short clips rather than one continuous follow. For coverage-per-dollar, though, nothing else in this lineup comes close.
Pros:
- Eight cameras and a 16-channel NVR provide whole-property coverage in one kit
- 12MP resolution with a 121° wide-angle lens captures more detail than 4K rivals
- Three night vision modes including color and spotlight alarm
- Human and vehicle detection with app alerts and two-way audio
Cons:
- Expanding beyond eight cameras requires a PoE switch that is not included
- Storage capacity is listed inconsistently: 4TB in the description, 3TB in the specifications
- Fixed cameras cannot auto-track subjects the way PTZ cameras can
Best for: Owners of large homes or small businesses who need maximum camera coverage and future expansion room
Not ideal for: Buyers who want object tracking, or anyone unwilling to verify storage details and buy a PoE switch later
Bottom line: The coverage-per-dollar champion, best for properties where more fixed cameras beat fewer moving ones.
“The coverage-per-dollar champion, best for properties where more fixed cameras beat fewer moving ones.”
Blink Outdoor 4 Wireless Security Camera System, 5 Cameras with Sync Module Core
The Blink Outdoor 4 exists for one reason: installation without cables. Each of the five cameras runs on AA lithium batteries rated for up to two years, mounts with a simple bracket, and connects over 2.4 GHz Wi-Fi — no drilling, no Ethernet, no electrician. Where the Reolink and Hiseeu systems demand a weekend of cable work, a Blink kit can be live in under an hour, which is why it remains the default choice for renters, apartments, and small homes. The wide 143° field of view also means each camera watches a generous slice of your property despite the modest 1080p resolution.That resolution is the honest tradeoff. Compared with Reolink’s 4K or Hiseeu’s 12MP, 1080p footage loses detail at distance — fine for knowing someone was in your yard, weaker for identifying a face across the driveway. The subscription situation cuts deeper: the included Sync Module Core has no local storage, cloud recording beyond the trial requires a paid plan, and even person detection is locked behind a subscription. The wired systems above include those features at no ongoing cost.Still, judged on its own terms, the Outdoor 4 does wireless well. Two-way audio, infrared night vision, and enhanced motion detection cover the essentials, and swapping batteries every couple of years beats recharging every few months. If you cannot run cables — or simply will not — this is the strongest option in the lineup, provided you accept the recurring costs.
Pros:
- Fully wireless: batteries rated for up to two years and tool-free mounting
- Five cameras cover multiple entry points out of one box
- Wide 143° field of view with infrared night vision and two-way audio
- Fast setup over 2.4 GHz Wi-Fi with no cables or professional installation
Cons:
- Sync Module Core does not support local storage
- Cloud storage and person detection both require paid subscriptions
- 1080p resolution trails far behind the 4K and 12MP wired systems for identifying detail
Best for: Renters, apartment dwellers, and anyone who wants multi-camera coverage with zero wiring
Not ideal for: Buyers who want subscription-free storage, person detection out of the box, or detail-rich footage for identification
Bottom line: The easiest path to multi-camera coverage, if you accept 1080p footage and subscription-dependent features.
“The easiest path to multi-camera coverage, if you accept 1080p footage and subscription-dependent features.”
As an Amazon Associate we earn from qualifying purchases.
Before You Start
Plan camera placement before drilling anything. For each camera, identify what you want it to see. Effective coverage usually means: one camera covering the main entry (front door), one covering the driveway or rear access point, and indoor cameras in main living areas or hallways — not bedrooms or bathrooms.
Follow these placement rules to avoid the most common problems:
- Mount cameras 8–10 feet (2.5–3 m) high — high enough to avoid tampering, low enough to capture faces rather than the tops of heads.
- Angle cameras slightly downward so the ground and approach path fill the frame.
- Never point a camera directly at a bright light source, the sun’s path, or a neighbor’s property.
- Avoid placing cameras where HVAC vents, heaters, or direct sun cause rapid temperature changes — this triggers false motion alerts on some models.
- Keep outdoor cameras under an eave or overhang if possible; most are weather-resistant, not waterproof.
Test placement before mounting. Hold each camera roughly in its planned position, connect it to the app, and check the live view. If the image is grainy, the frame misses the area you care about, or the Wi-Fi connection drops, adjust now — not after the holes are drilled.
Step-by-Step Instructions
Step 1: Download the app and create an account
Download your camera manufacturer’s app from the App Store or Google Play (for example, Ring app, Google Home for Nest, Wyze app, Arlo app). Open the app, create an account using your email address, and verify it through the confirmation email. Set a strong, unique password — this account controls live video of the inside of your home.
Tip: Enable two-factor authentication in the app’s security settings. Camera accounts are frequent hacking targets, and this one setting blocks most account takeovers.
Check: You can log into the app and see a home screen with an option to add a new device.
Step 2: Charge or power the camera
Charge battery-powered cameras fully using the included cable — typically 4–8 hours. Plug plug-in models into an outlet now so they boot up. Watch for a status light: most cameras blink or glow during startup and show a steady or distinct color (often blue or green) when ready to pair.
Tip: Never mount a battery camera before charging it. Repeatedly removing and remounting a camera loosens the mount and wears out the screw anchors.
Check: The camera shows its ready-to-pair light pattern (check the manual for your model’s specific colors).
Step 3: Connect the camera to Wi-Fi through the app
Tap Add Device (or the plus icon) in the app, select your camera model, and follow the prompts. Scan the QR code displayed on your phone screen with the camera, or press the pairing button on the camera when instructed. Select your home Wi-Fi network, enter the password, and wait 1–2 minutes for the camera to connect.
Tip: Do this step indoors, close to your router. If the app reports a connection failure, confirm your phone is connected to the same network you are giving the camera, and that the network is 2.4 GHz if the camera requires it.
Check: The app shows the camera as online and you can see a live video feed on your phone.
Step 4: Verify coverage from the live view and adjust the angle
Hold the camera in its planned position (or have a helper hold it) and watch the live view on your phone. Check three things: the area you want monitored fills the frame, faces would be visible at approach distance, and the image is sharp rather than pixelated. Ask someone to walk through the monitored zone and confirm they are clearly visible on the stream. Make small adjustments until the framing is right.
Check: The live view clearly shows the target area, and a person walking through it is recognizable on your phone screen.
Step 5: Mark and drill the mounting holes
Hold the mounting bracket against the wall at your verified position and mark the screw holes with a pencil. Remove the bracket, then drill pilot holes at the marks — into studs if you hit wood, or with masonry bits and the included wall anchors if the surface is brick, stucco, or concrete. Insert the anchors and check that the drill stays level. For outdoor installs, check behind the wall for wiring or pipes if possible.
Tip: For outdoor cable runs, drill the cable entry hole at a slight downward angle facing the wall so rain cannot run into it, and seal around the cable with silicone after threading it through.
Check: Anchors sit flush with the wall and the bracket mounts without wobbling when you tug it firmly.
Step 6: Attach the camera and route cables
Screw the mounting plate to the wall, click or slide the camera onto the plate, and tighten any adjustment nuts or set screws to lock the angle. Route plug-in camera cables along the wall using the included clips, keeping them out of easy reach, and plug them into a weatherproof outdoor outlet or an indoor outlet through the wall entry hole.
Tip: Leave a small drip loop in outdoor cables — a downward sag before the entry point — so water runs off instead of following the cable inside.
Check: The camera is firmly mounted, does not shift when nudged, and shows a steady live view in the app.
Step 7: Configure motion detection and alerts
Open the camera’s settings in the app and draw the motion detection zone — box the area you want monitored (such as the front porch) and exclude streets, sidewalks, and trees, which otherwise generate constant false alerts. Set motion sensitivity to medium, then enable push notifications and select person detection if available, so you are not alerted by every passing cat or blowing leaf.
Check: When you walk through the detection zone, an alert arrives on your phone within a few seconds, and walking outside the zone does not trigger one.
Step 8: Set up recording storage
Insert a microSD card if your camera supports local storage, or activate a cloud subscription in the app to save clips automatically. Enable continuous or event-based recording using the app’s options. Complete one of these — without storage configured, most cameras only show live view and brief event clips.
Tip: Test recording immediately: trigger a motion event, wait a minute, then check the app’s event history to confirm the clip was saved and is playable.
Check: Triggered motion events appear in the app’s history with viewable recorded clips.
Step 9: Test the full system end to end
Walk up to each camera from outside the detection zone as a stranger would, and confirm on your phone that you received an alert and that the recorded clip shows your approach clearly. Press the microphone button and speak to test two-way audio if the camera has a speaker. Check the live view in a dark room or after dark to confirm night vision produces a usable image. Name each camera clearly in the app (for example, ‘Front Door’, ‘Driveway’) so alerts are identifiable.
Check: Every camera triggers an alert, records a clear clip, and streams live video on both Wi-Fi and cellular data on your phone.
Common Mistakes to Avoid
- Mounting the camera before connecting and testing it — Always pair the camera to Wi-Fi and verify the live view while holding it in position. Discovering a bad angle or weak signal after drilling means redoing the entire mount.
- Placing cameras out of Wi-Fi range — Check signal strength at each mounting location before installation. If the feed is laggy or drops out, move the router, add a Wi-Fi extender near the camera, or choose a camera that connects through a hub.
- Pointing cameras at streets, sidewalks, or the sun — Use motion zones to exclude passing traffic and direct sunlight, and angle cameras downward at entry paths. This prevents alert fatigue, which causes people to disable notifications entirely.
- Skipping storage setup and assuming footage is saved — Insert a microSD card or activate a recording plan before relying on the system, and verify a test clip appears in the event history.
Troubleshooting
Problem: Camera will not connect to Wi-Fi
Solution: Confirm the camera is in pairing mode (status light blinking per the manual), your phone is on the correct network, and the network is 2.4 GHz if required. Move the camera within 10 feet of the router and retry. Reboot the router if the failure repeats.
Problem: Live view is pixelated or constantly buffering
Solution: The Wi-Fi signal at the camera is too weak. Add a Wi-Fi extender or mesh node near the camera, or reduce the video quality setting in the app. Battery cameras in cold weather also stream poorly — check the battery level.
Problem: Too many false motion alerts
Solution: Lower motion sensitivity, redraw the activity zone to exclude trees, streets, and reflective surfaces, and enable person detection if your model or subscription offers it.
Problem: Battery camera drains in days instead of months
Solution: Excessive motion events are the usual cause — refine the activity zone. Cold weather below freezing also shortens battery life significantly. If the camera must run continuously or record constantly, switch to a plug-in model.
What Success Looks Like
Your installation is complete when all of the following are true: every camera streams clear live video to your phone from anywhere (test on cellular data away from home), each camera triggers a push notification within seconds when someone enters its detection zone, motion clips are recorded and playable in the app’s history, night vision produces a recognizable image after dark, and outdoor cables are secured, sealed against weather, and not easily reachable from the ground. Do a final walkthrough after dark and again the next morning to confirm alerts and recordings work across different lighting conditions.
Next Steps
After installation, take these follow-up actions within the first week:
- Refine activity zones and sensitivity based on the alerts you actually receive — expect to tune settings two or three times before false alerts settle down.
- Share camera access with household members through the app’s guest or shared-access feature rather than giving out your login.
- Add a note to your calendar to check battery levels monthly for battery-powered cameras and to clean lenses every few months.
- Check whether local laws in your area require signage for recording, and adjust indoor cameras to avoid private areas.
- If alerts feel insufficient or coverage has gaps, plan a second camera for blind spots — typically rear doors, side yards, or ground-floor windows.
Frequently Asked Questions
Do I need a subscription for smart cameras to work?
No, cameras stream live video and send basic motion alerts without a subscription in almost all cases. However, recorded clip storage, person detection, and longer event history often require a subscription or a microSD card. Check what your specific model offers locally before committing.
How many cameras do I need for a typical house?
Most homes are well covered with two to four cameras: front door, driveway or garage, and rear entry. Add indoor cameras only where you genuinely want monitoring, such as a main hallway or a room with valuables.
Can someone disable or steal an outdoor camera?
Partially. Mount cameras at 8–10 feet to keep them out of easy reach, and choose models that store footage in the cloud — if the camera is stolen, the clips of the theft are already saved remotely. Some brands offer replacement guarantees for stolen cameras.
Will cameras still work during a power or internet outage?
Plug-in cameras stop during a power outage unless paired with a backup battery. Internet outages block remote viewing and cloud recording; battery cameras with local microSD storage continue recording locally, and some models (Ring, for example) support optional LTE backup.
Is it legal to point security cameras at my yard and street?
Recording your own property is generally legal, but laws on capturing public areas and neighbors’ property vary by region. Point cameras at your own entry points, use activity zones to limit what triggers recording, and avoid indoor cameras in bathrooms and bedrooms. Check local regulations if you are unsure.
Fall Picks
fall essentials
As an affiliate, we earn on qualifying purchases.