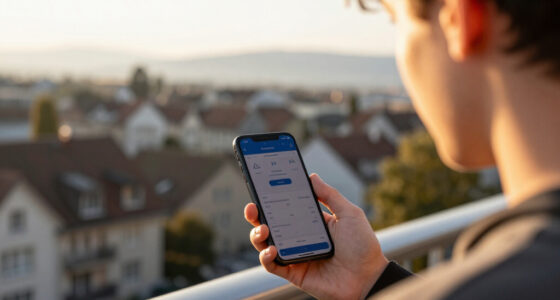
This guide walks you through the complete process of installing smart home security cameras: choosing mounting locations, physically mounting the cameras, connecting them to your Wi-Fi network and smartphone app, and configuring motion alerts and recording so the system actually protects your home. By the end, you will have working cameras you can view live from anywhere, with notifications that reach your phone when something happens.

Get the latest gadgets delivered free — and shop member deals
- Fast, free delivery on millions of items
- Access to Prime Big Deal Days deals on October 6–7
- Prime Video, Amazon Music and more included

Blink Outdoor 4 Wireless Smart Security Camera System, 3 Cameras
- ✔ Camera count: 3
- ✔ Video resolution: 1080p HD
- ✔ Night vision: Infrared
Blink Outdoor 4 Wireless Security Camera System, 5 Cameras
- ✔ Camera count: 5
- ✔ Video resolution: 1080p HD, up to 30 fps
- ✔ Field of view: 143° diagonal
Blink Outdoor 4 Wireless Security Camera System, 2 Cameras
- ✔ Camera count: 2
- ✔ Video resolution: 1080p HD
- ✔ Night vision: Infrared
This guide is written for beginners with no prior smart home experience. It applies to most consumer cameras from brands like Ring, Blink, Wyze, Eufy, Google Nest, Arlo, and TP-Link Tapo. Expect to spend 1–3 hours total, most of it on placement planning and mounting.
Difficulty: Beginner | Time: 1-3 hours (depending on number of cameras)
What You’ll Need
Tools & Materials:
- Smart security camera(s) with mounting hardware (screws, anchors, brackets)
- Smartphone running the camera manufacturer’s app
- Drill with a small masonry or wood bit (for wall mounting)
- Screwdriver (usually Phillips)
- Stud finder or knocking technique to locate wall studs
- Ladder or step stool for elevated mounting
- Pencil for marking drill holes
- Strong Wi-Fi at each camera location (2.4 GHz network)
- Charged batteries or nearby power outlet, depending on camera type
Knowledge:
- Basic smartphone use: downloading apps, signing into accounts, connecting to Wi-Fi
- Ability to use a drill and screwdriver safely
- Knowledge of your home Wi-Fi network name (SSID) and password
Before buying or mounting anything, confirm two things. First, check whether your cameras are battery-powered, plug-in, or wired — this determines where you can place them. Second, check your Wi-Fi band: most budget and mid-range cameras only connect to 2.4 GHz networks, not 5 GHz. If your router broadcasts both bands under one network name, the app will usually handle this automatically, but if setup fails repeatedly, the band mismatch is the most common cause.
Create or locate the account you will use with the camera app (Apple ID, Google account, or an email address). Use an email address you check regularly, and enable two-factor authentication on that account — it is the key to your cameras.
Blink Outdoor 4 Wireless Smart Security Camera System, 3 Cameras
When we weigh coverage against practicality, the three-camera bundle hits the sweet spot for the largest group of buyers. Three cameras map neatly onto the three zones security professionals say matter most: the front entrance, the backyard, and a driveway or side gate. That’s a complete perimeter for most single-family homes without forcing you to invent places to mount surplus hardware.Compared with the two-camera kit, this bundle gives you a meaningful jump in coverage for the marginal cost of one extra camera, mounting kit, and batteries — all included. Compared with the five-camera system, it avoids the diminishing returns that kick in once your primary blind spots are covered. Unless you have a large lot, outbuildings, or a long driveway, cameras four and five tend to end up watching low-traffic corners.The tradeoffs are shared across the lineup: the Sync Module Core lacks local storage, and person detection sits behind a subscription. Dual-zone enhanced motion detection still works without a plan, but expect more false triggers from animals and passing cars until you subscribe. Two-way audio and Alexa integration round out a package that’s genuinely easy to live with day to day.
Pros:
- Three cameras cover the front, back, and side entry points of a typical home
- Up to two years of battery life per camera on included Energizer lithium cells
- Two-way audio and dual-zone motion detection come standard
- Full Alexa integration with included mounting kits and power accessories
Cons:
- Sync Module Core does not support local storage without a separately purchased accessory
- Person detection and cloud clip storage require an optional subscription
Best for: Owners of average-sized homes who want full entry-point coverage in a single purchase
Not ideal for: Buyers who refuse any recurring subscription or need local storage out of the box
Bottom line: The most balanced way to buy into Blink’s ecosystem — enough cameras for real coverage without paying for hardware you won’t use.
“The most balanced way to buy into Blink’s ecosystem — enough cameras for real coverage without paying for hardware you won’t use.”
Blink Outdoor 4 Wireless Security Camera System, 5 Cameras
Some properties simply can’t be secured with two or three cameras. If you have a large lot, a detached garage, a long driveway, or extensive backyard blind spots, the five-camera bundle is the only option in this lineup that covers everything without a second purchase. Five mounting kits and ten lithium batteries ship in the box, so every camera is ready to deploy the day it arrives.Where the three-camera kit targets the typical suburban home, this bundle is built for properties with multiple access points — think corner lots, homes with alley access, or anyone who wants interior cameras added later in the same ecosystem. The 143° diagonal field of view on each unit helps, letting a single camera watch a wide driveway or an entire side yard with fewer units than narrower competitors would need.The honest tradeoff: you’re buying more of the same limitations, not fewer. Every camera still depends on the subscription-gated person detection, the 2.4 GHz-only Wi-Fi connection, and non-rechargeable AA cells. If your router is far from your outdoor cameras, connectivity — not camera count — will be your bottleneck. But for buyers whose problem is scale rather than features, this is the right tool.
Pros:
- Five cameras secure every access point on a large property in one purchase
- 143° diagonal field of view reduces the number of cameras needed per zone
- Includes everything to deploy: batteries, mounting kits, USB-C cable, and power adapter
- Expandable within the Blink ecosystem via Sync Module compatibility
Cons:
- Person detection and cloud storage require a subscription across all five cameras
- Non-rechargeable AA lithium batteries mean five cameras to refuel eventually
- 2.4 GHz-only Wi-Fi can struggle at long distances from the router
Best for: Owners of large properties, corner lots, or homes with detached structures and multiple access points
Not ideal for: Small homes or apartments where extra cameras would sit unused in a drawer
Bottom line: The right pick when your problem is scale — five-camera coverage of an entire property, as long as you accept the subscription model.
“The right pick when your problem is scale — five-camera coverage of an entire property, as long as you accept the subscription model.”
Blink Outdoor 4 Wireless Security Camera System, 2 Cameras
Not everyone needs a perimeter. For a condo, a small home, a rental property, or a first dip into smart security, two well-placed cameras at the front door and backyard cover the highest-risk zones — and this bundle is the lowest-commitment way into the Blink Outdoor 4 platform. You get the identical camera hardware as the larger kits: 1080p live view, infrared night vision, two-way talk, and the same dual-zone motion detection.Compared with our Best Overall pick, the limitation is simply headroom. Once those two camera positions are filled, any expansion means a separate purchase, which usually costs more per camera than buying a bigger bundle upfront. So the value calculation only works if you’re confident two cameras are genuinely enough — if you suspect you’ll want a third, jump straight to the three-camera kit.The subscription tradeoff stings slightly more here. On a small two-camera setup, adding a recurring plan for person detection can feel disproportionate, and with no local storage included, your realistic options are paying monthly or buying a storage accessory separately. Still, as a trial-sized entry into smart security with years of battery life per camera, it’s a sensible, low-risk starting point.
Pros:
- Lowest-commitment entry into the Blink Outdoor 4 ecosystem
- Same camera hardware and features as the larger bundles
- Up to two years of battery life with batteries included
- Straightforward setup with Alexa integration
Cons:
- Expanding later costs more per camera than buying a larger bundle now
- No local storage included; person detection requires a subscription
- Additional storage accessories sold separately
Best for: First-time buyers, renters, and owners of small homes who only need front and back coverage
Not ideal for: Anyone who already suspects they’ll need more than two cameras
Bottom line: A smart, low-risk starter kit — provided you’re honest with yourself that two cameras will stay enough.
“A smart, low-risk starter kit — provided you’re honest with yourself that two cameras will stay enough.”
As an Amazon Associate we earn from qualifying purchases.
Before You Start
Test before you mount. Unbox each camera, charge or insert batteries, download the manufacturer’s app, and complete the in-app setup while sitting at your kitchen table. Adding the camera to the app and connecting it to Wi-Fi is far easier to troubleshoot when the camera is in your hand rather than screwed to a wall twelve feet up.
Plan placement before drilling any holes. Walk your property and decide where each camera goes. Good default locations: the main front entrance (covering the doorbell area and approach), the back or side door, the driveway or garage, and any ground-floor windows hidden from street view. Mount cameras 8–10 feet high — high enough to stay out of easy reach, low enough to capture faces rather than the tops of heads. Angle cameras slightly downward and avoid pointing them at busy public sidewalks or a neighbor’s property, which creates excessive alerts and privacy issues.
Check Wi-Fi strength at each mounting spot. Stand where the camera will go and check your phone’s Wi-Fi signal. If your phone shows one bar or keeps dropping the network, the camera will struggle there too, and you will need a Wi-Fi extender or mesh node nearby before proceeding.
Step-by-Step Instructions
Step 1: Charge the cameras and download the app
Insert batteries or fully charge battery-powered cameras using the included cable — most ship partially charged but not full. Plug in wired cameras to a working outlet. Then download the manufacturer’s app from the App Store or Google Play (for example, Ring app, Blink Home Monitor, Wyze, Google Home, Arlo Secure, Tapo). Open the app and create an account or sign in, using a strong unique password and enabling two-factor authentication when prompted.
Tip: Register each camera to the same account so you can view all feeds in one app.
Check: The app opens to a signed-in home screen with an option to add a device.
Step 2: Add the first camera to the app while indoors
Tap Add Device or the plus icon in the app, select your camera model, and follow the on-screen prompts. Scan the QR code on the camera or box, press the pairing button on the camera, and enter your Wi-Fi password when prompted. Keep the phone within a few feet of the camera during pairing.
Tip: If the app cannot find the camera, reset it by holding the pairing or sync button for 10–15 seconds until its light flashes, then try again.
Check: The app shows a live view from the camera within about a minute of setup completing.
Step 3: Test the live view, microphone, and speaker
Open the live view in the app and confirm the image is sharp and the framing captures what you expect. Speak near the camera and check that audio comes through on your phone; play sound from your phone and confirm the camera’s speaker is audible. Adjust any image settings the app offers, such as night vision mode or video quality.
Tip: Set video quality to the highest option your internet plan supports. If live view stutters, drop to medium quality and revisit your Wi-Fi setup later.
Check: Live video loads within a few seconds, and two-way audio works in both directions.
Step 4: Configure motion detection and alerts before mounting
Open the app’s settings for the camera and find motion detection or activity zones. Set sensitivity to medium to start, then define activity zones if the feature exists — draw boxes over the areas you want monitored (the walkway, the door) and exclude high-traffic zones (the street, swaying tree branches). Enable push notifications for motion events and set a schedule if you only want alerts at certain hours.
Tip: Walk in front of the camera at the distance a person would approach your door. You should get a notification within about 10 seconds. If you get none, raise sensitivity; if you get alerts from passing cars, tighten the activity zones.
Check: Walking through the monitored zone triggers a phone notification, and street traffic does not.
Step 5: Mount the camera at the planned location
Hold the camera (or its mounting bracket) against the wall at the marked spot at roughly 8–10 feet high. Check the live view on your phone one final time to confirm the angle covers your target area, then mark the screw holes with a pencil. Drill pilot holes at the marks — into a stud if you found one, otherwise insert wall anchors first for drywall or brick. Screw the bracket or base plate into place, then attach the camera and adjust its angle. Tighten any ball-joint locking ring so wind cannot shift the view.
Tip: For battery cameras, make sure the camera detaches easily from its mount for recharging — do not lock it into a position that requires uninstalling screws to remove.
Check: The camera is firm against the wall with no wobble, and the live view shows the intended coverage area.
Step 6: Route power cables and weatherproof outdoor connections
Run the power cable to the nearest outlet for plug-in cameras, securing it along the wall with cable clips so it is not dangling or reachable from the ground. Plug into a weatherproof cover if the outlet is outdoors. For cameras with removable power connectors, angle the connection point downward and seat the rubber weather seal fully — most outdoor-rated cameras are only water-resistant when the cable is properly seated.
Tip: Use outdoor-rated cables and clips; indoor extension cords are not safe or weatherproof for exterior use.
Check: The camera maintains power with the cable secured, and no connectors are exposed to direct rain.
Step 7: Set up recording storage and subscriptions
Decide where recorded footage lives. Most cameras offer one of three options: local storage on a microSD card inserted into the camera or a hub, free cloud clips, or a paid subscription for cloud recordings. Insert a microSD card if your camera supports it, or subscribe through the app if you want cloud history — free tiers often only show live view and brief clips. Enable continuous or event-based recording per your preference and storage limits.
Tip: Event-based recording (clips triggered by motion) is usually enough for home security and uses far less storage than continuous recording.
Check: Trigger a motion event, then check the app’s history or library section and confirm a recorded clip appears that you can replay.
Step 8: Run a full system test at night
Approach each camera the way an intruder would after dark. Confirm night vision engages (the live view switches to black-and-white infrared), motion alerts fire on your phone, and recorded clips capture your approach clearly. Walk the full path from the property edge to the door and verify the camera sees you for most of it.
Tip: If night vision shows a washed-out white image, something reflective (a wall, gutter, or sign) is too close to the camera and reflecting infrared light. Reposition slightly.
Check: Each camera produces a clear night image, sends alerts, and records footage during the test walk.
Common Mistakes to Avoid
- Mounting the camera first, then trying to set it up in the app — Always complete pairing, Wi-Fi connection, and app configuration at a table before drilling a single hole. Fixing connection problems is much harder on a ladder.
- Placing cameras where Wi-Fi signal is weak — Check phone Wi-Fi strength at every intended mounting location beforehand. If signal is poor, add a Wi-Fi extender or mesh node near that side of the house before installing.
- Pointing cameras at the street or sidewalk — Use activity zones to exclude public walkways and roads. This prevents alert fatigue so you stop ignoring notifications — a system you’ve tuned out provides no security.
- Ignoring the default settings and never testing alerts — Walk-test every camera after setup, both day and night. Verify a notification actually arrives on your phone and a clip is recorded, rather than assuming the defaults work.
Troubleshooting
Problem: Camera will not connect to Wi-Fi during setup
Solution: First, confirm your phone is connected to the same network you’re giving the camera, and that it’s a 2.4 GHz network if the camera requires one. Move the camera and phone closer to the router during pairing. If it still fails, check for special characters in the Wi-Fi password — some cameras choke on symbols; temporarily changing the password to letters and numbers can fix pairing. Reset the camera with a 10–15 second hold on its sync button and try again.
Problem: Live view is laggy, pixelated, or drops out
Solution: This is almost always bandwidth or signal. Check the camera’s signal strength indicator in the app; if weak, add a Wi-Fi extender roughly halfway between the router and the camera. Reduce video quality in the app settings, and limit how many devices stream simultaneously. Cameras far from the router on the opposite side of the house benefit most from a mesh Wi-Fi node.
Problem: Too many false motion alerts
Solution: Lower motion sensitivity, then redraw activity zones to exclude trees, bushes, the road, and heat sources like vents or reflective surfaces. If the camera supports smart person detection, enable it so only people trigger alerts rather than every passing car or animal.
Problem: Night vision image is white, washed out, or dark
Solution: A white glare means the infrared LEDs are reflecting off something within a couple of feet of the lens — a wall, eave, window screen, or the mount itself. Tilt the camera slightly away or move it out a few inches. A pitch-black image usually means the area has zero ambient light and the camera lacks infrared; add a motion-activated floodlight nearby.
What Success Looks Like
Your installation is complete when all of the following are true:
- Every camera appears in the app and shows a live view within a few seconds of opening it, day or night.
- Walking toward each monitored entrance triggers a phone notification, and a recorded clip appears in the app’s history that you can replay.
- Each camera is mounted securely at 8–10 feet, angled to capture faces at your doors, with cables weatherproofed and out of reach.
- You receive alerts from real activity, not constant notifications from passing cars or swaying branches.
- Footage is being saved somewhere — microSD card, hub, or cloud subscription — and you’ve verified clips from several days back are retrievable.
Next Steps
Add shared users: invite household members to the camera account through the app so more than one person receives alerts and can view feeds.
Check recordings weekly for the first month to confirm clips are saving correctly and no camera has gone offline unnoticed. Most apps show an offline indicator — act on it promptly.
Maintain the system: recharge or swap batteries when the app warns you (typically every 1–6 months depending on model and activity), and wipe lenses with a soft cloth every couple of months, since dirt and spiderwebs are the most common cause of degraded image quality.
Consider additions: a video doorbell at the front door, contact sensors on doors and windows, or outdoor smart lights that trigger on motion — lighting dramatically improves night footage and deters approach in the first place.
Review your camera account password and two-factor settings every six months. If you ever sell or give away a camera, perform a factory reset and remove it from your account first.
Frequently Asked Questions
Do I need a subscription for smart security cameras to work?
No. Cameras function for live viewing and real-time alerts without a subscription in almost all cases. What subscriptions add is cloud storage of recorded clips and features like person detection on some brands. If your camera has a microSD slot or supports a local hub, you can store recordings locally with no ongoing fees.
How many cameras do I need for a typical house?
Most homes are well covered with two to four cameras: one at the front entrance, one at the back door, and optionally one covering the driveway or side yard. Start with the front and back entrances, which account for the majority of break-in entry points, and expand only if the test walk reveals blind spots.
Are battery cameras or wired cameras better?
Wired (plug-in) cameras are more reliable — continuous power means continuous recording capability and no recharging. Battery cameras are far easier to install since no outlet is needed and placement is flexible. Choose wired where an outlet is conveniently available, and battery where it isn’t.
Can someone disable or steal my outdoor camera?
A camera mounted at 8–10 feet is difficult to reach without a ladder. Many models keep recording to the cloud even if unplugged or stolen afterward, and some (like Nest and Ring) have theft replacement programs. Note the serial numbers of your cameras and keep receipts to support any theft claim.
Will cameras still record if my internet or power goes out?
Battery cameras with local microSD storage continue recording locally during internet outages, but remote viewing and cloud uploads stop. Plug-in cameras stop entirely during a power outage unless on a battery backup (UPS). If outage resilience matters, choose cameras with local storage and consider a small UPS for your router and hub.
Fall Picks
fall essentials
As an affiliate, we earn on qualifying purchases.