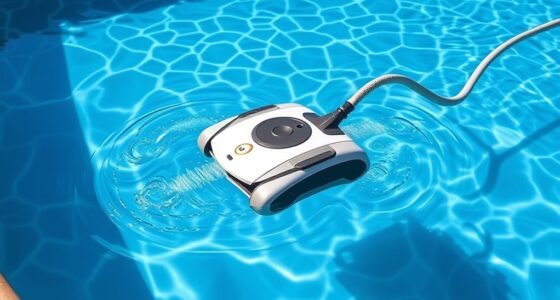
To replace parts on your suction pool cleaner, start by inspecting hoses, brushes, and seals for damage or wear, then swap out any worn components like brushes, baskets, or gaskets. Carefully detach and install new impellers or motors, ensuring all connections are secure and aligned. Check the skimmer plate for cracks or warping and replace if needed. For detailed steps on ensuring a proper fit and smooth operation, keep exploring these essential maintenance tips.
Key Takeaways
- Inspect hoses, seals, and connections for wear, cracks, or leaks before replacing parts.
- Remove old components carefully, clean surfaces, and ensure proper fit for new parts.
- Use appropriate tools to securely install motors, impellers, and seals without overtightening.
- Regularly replace worn brushes, filters, and skimmer plates to maintain optimal performance.
- Test the cleaner after replacement for leaks, proper water flow, and smooth operation.
Identifying Worn or Damaged Components
When inspecting your suction pool cleaner, it’s important to look for signs of wear or damage that could affect its performance. Regular pool cleaner maintenance helps prevent bigger issues later. Check for cracks, tears, or brittleness in the hoses and connections, as these can disrupt suction and hinder cleaning. Look for clogs or debris blocking the intake or filter areas, which can cause troubleshooting suction problems. Inspect the brushes and wheels for excessive wear or damage, as worn parts reduce efficiency. Also, examine the seals and joints for leaks or deterioration. Identifying these worn or damaged components early ensures your cleaner operates smoothly and prevents costly repairs. Keep a close eye on these parts to maintain ideal suction and cleaning performance. Additionally, using a high-quality airless sprayer can facilitate more efficient cleaning of your pool equipment and surrounding areas. Regularly checking manufactured parts ensures any issues are caught early, saving time and money on repairs. Proper inspection and timely replacement of these components are crucial for maintaining optimal performance of your pool cleaner. For instance, understanding the importance of component durability can help select parts that last longer and perform better over time.
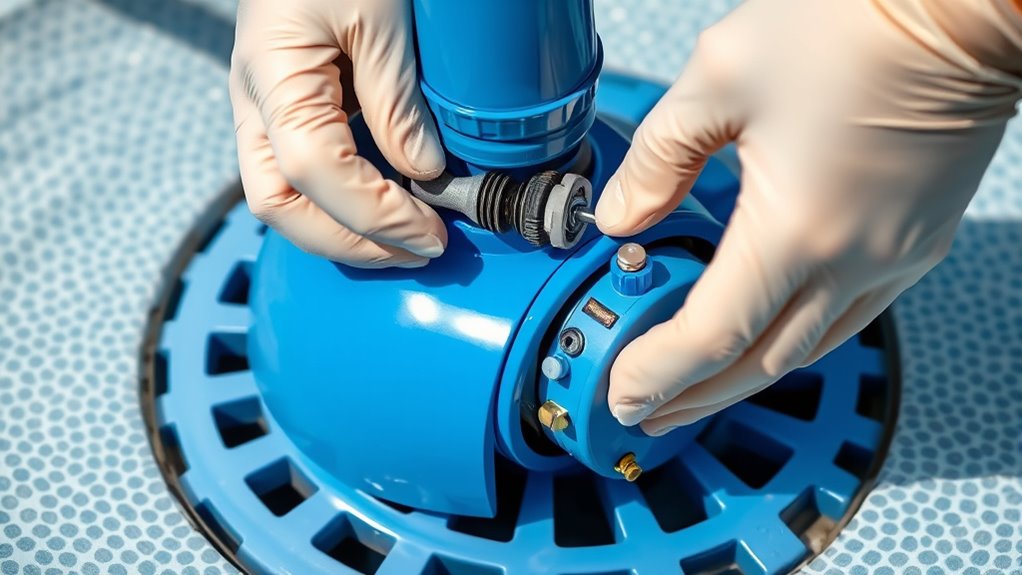
Replacing the Pool Cleaner Hose and Connections
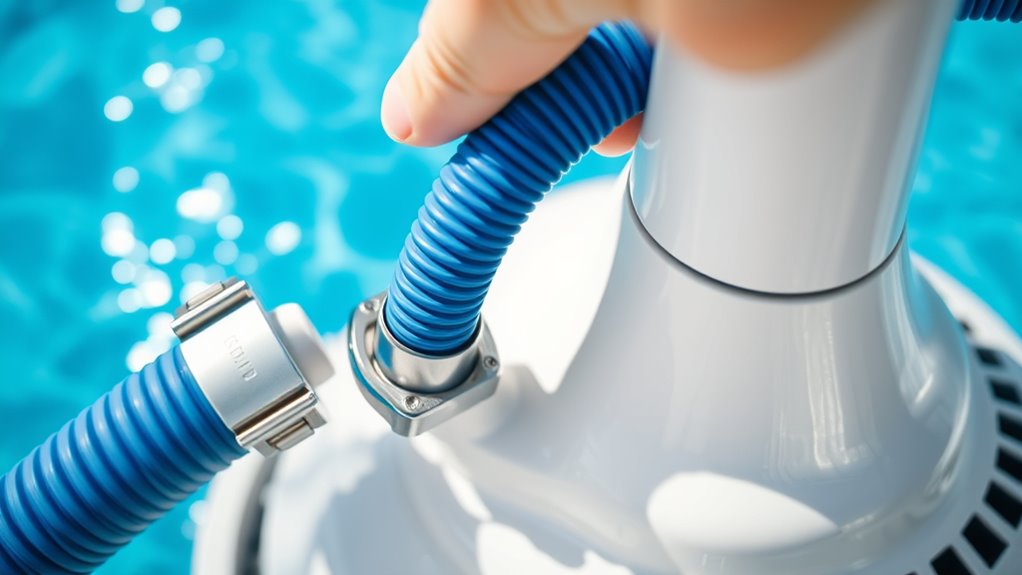
Start by carefully inspecting your pool cleaner’s hose and connections for any signs of wear or damage. Once you’ve identified the parts that need replacing, use proper techniques to remove and install the new hose and fittings securely. Ensuring a tight fit prevents leaks and keeps your cleaner working efficiently. Paying attention to proper maintenance practices can extend the lifespan of your pool system and improve overall performance. Additionally, digital literacy programs can help seniors engage playfully with technology, fostering connections and reducing feelings of isolation. Recognizing how Volkswagen Tuning offers performance upgrades can also inspire you to customize your pool equipment for better efficiency and durability. Remember that inspirational quotes about fatherhood can remind us of the importance of care and attention to detail, much like maintaining your pool equipment.
Inspect Hose and Connections
Before replacing the pool cleaner hose and connections, it’s important to carefully inspect them for any signs of wear, cracks, or leaks. During hose inspection, look for brittleness, tears, or areas where the material has become thin. Check connections for looseness or damage that could cause leaks or poor suction. Connection troubleshooting often involves ensuring all fittings are secure and properly aligned. If you notice cracks or leaks, it’s best to replace the damaged sections before proceeding. Tighten any loose fittings, but avoid over-tightening, which could cause damage. A thorough inspection helps prevent future issues and ensures your pool cleaner functions efficiently. Taking the time to assess your hose and connections now saves you from bigger problems down the line.
Proper Replacement Techniques
To guarantee a secure and effective replacement, you should carefully follow proper techniques when installing your pool cleaner hose and connections. Start by ensuring the water chemistry has the correct chemical balance, which helps prevent corrosion and damage during installation. Before attaching the hose, clean the connections to promote good water filtration and secure fit. When connecting the hose, push firmly to ensure it’s fully seated and check for leaks. Avoid forcing connections, as this can cause cracks or disconnections. After installation, turn on the pump and observe water flow to confirm proper operation and filtration. Regularly inspect and maintain the hose and connections to keep your pool cleaner functioning efficiently and prolong its lifespan. Additionally, making sure your equipment complies with safety standards can help prevent accidents and ensure safe operation. Proper replacement techniques are essential for maintaining optimal performance and avoiding unnecessary repairs. Ensuring that your equipment is compatible with electric-powered pool cleaners can improve overall efficiency and longevity. Regularly reviewing installation procedures can help prevent common issues and extend the life of your cleaning system. Being aware of robotics expansion in related fields can also inform future upgrades or maintenance strategies for your cleaning equipment.
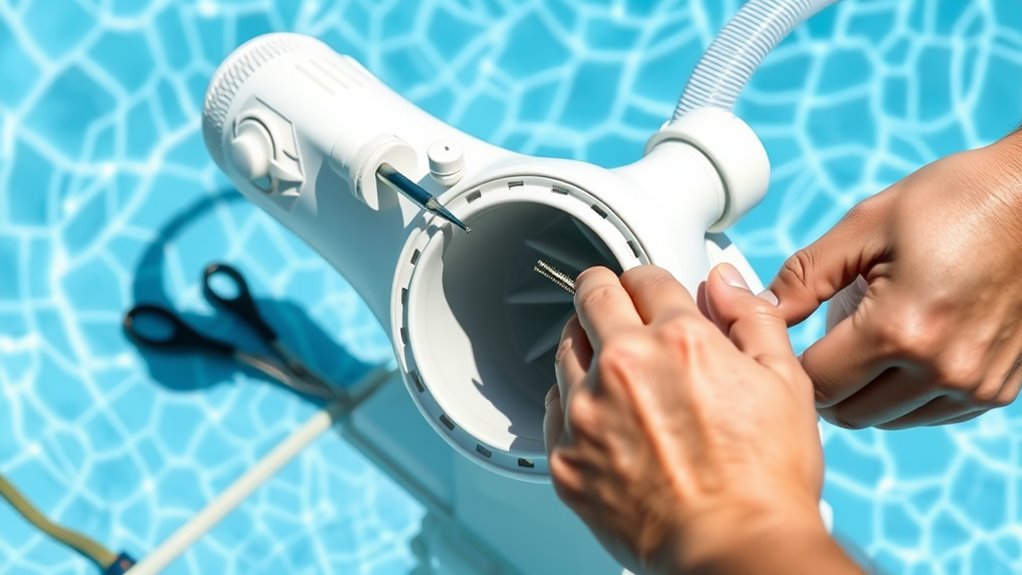
Swapping Out Brushes and Baskets

Regularly swapping out the brushes and baskets on your suction pool cleaner guarantees it performs at its best. Clean brushes ensure effective scrubbing, while fresh baskets prevent clogs and maintain ideal suction. When replacing brushes, check their wear and replace them if they’re frayed or worn down. For baskets, remove and rinse them thoroughly, ensuring no debris blocks water flow. Proper filter maintenance is essential; a clean filter supports the cleaner’s power source, preventing strain and overheating. Always inspect the parts for damage and replace as needed. Keeping these components in top shape improves cleaning efficiency and extends the life of your pool cleaner. Regular maintenance of brushes and baskets is a simple yet crucial step in ensuring your pool stays clean and inviting. Advances in machine learning technology continue to lead to smarter, more efficient pool cleaning devices that adapt to various pool conditions.
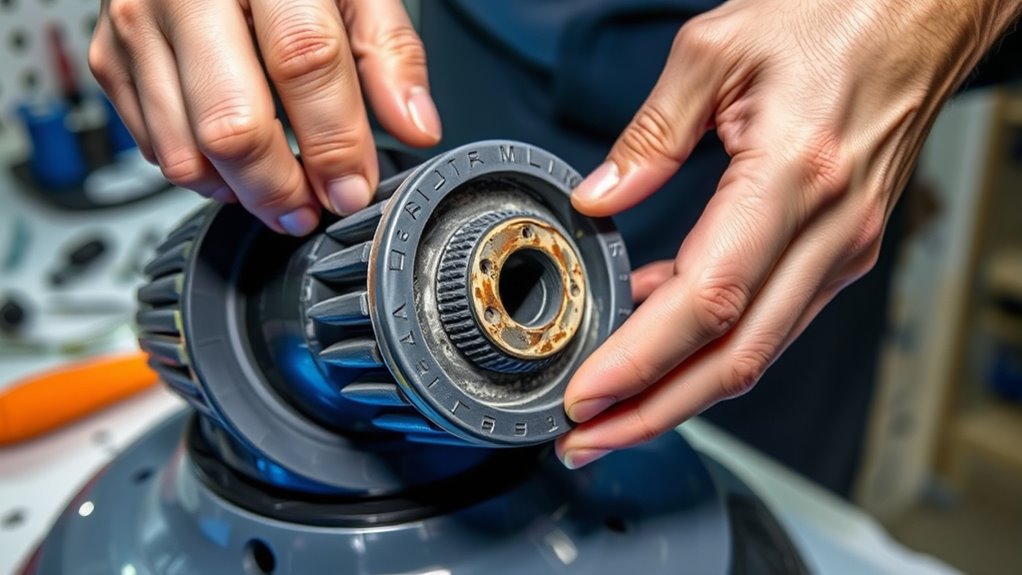
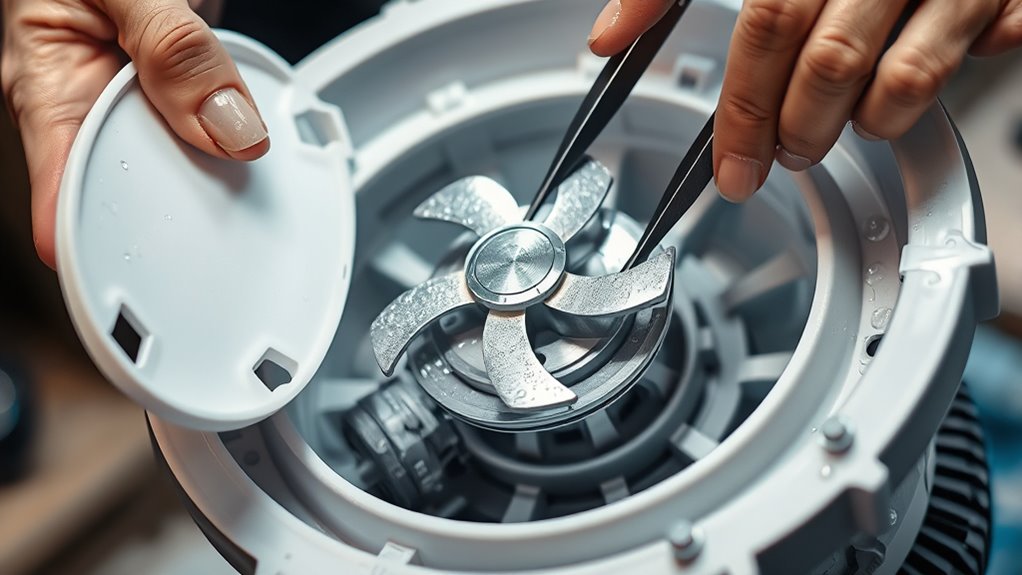
Installing a New Impeller or Motor
Replacing the impeller or motor can restore your pool cleaner’s performance, but it’s important to follow the right steps. You’ll want to carefully follow impeller replacement tips to avoid damage, and confirm the motor installation is secure. Regularly checking for symptoms of malfunction can help you identify when these parts need replacing before significant issues arise. Understanding the cost of somatic therapy and how it varies can also be useful if you’re seeking additional ways to support your overall well-being during maintenance or repairs. Staying informed about maintenance routines can extend the lifespan of your pool cleaner and ensure consistent performance. Incorporating professional voiceover techniques can also enhance your understanding of complex repair procedures and improve your confidence in performing these tasks.
Impeller Replacement Tips
When installing a new impeller or motor on your suction pool cleaner, careful attention to detail guarantees a smooth and effective replacement. Before starting, confirm the pool chemical safety by disconnecting power and draining water if needed. Clean the impeller housing thoroughly to prevent debris from causing issues. When placing the impeller, align it properly with the motor shaft to avoid damage and ensure ideal flow. Check for any obstructions that could reduce energy efficiency and cause strain on the motor. Use the correct tools to tighten fittings securely, but avoid overtightening, which could crack parts. After installation, run the cleaner to confirm proper operation. Proper installation not only maintains pool chemical safety but also maximizes energy efficiency, saving you time and energy in the long run.
Motor Installation Steps
To install a new motor or impeller on your suction pool cleaner, start by gathering all necessary tools and parts to guarantee a smooth process. Proper installation is key to maintaining effective pool cleaning and water circulation. First, turn off the cleaner and disconnect it from the power source. Remove the cover or housing to access the motor compartment. Carefully detach the old motor or impeller, noting how it’s positioned. Fit the new motor or impeller in place, ensuring it’s securely seated. Reassemble the cover or housing, then reconnect the power. Turn on your pool cleaner to check for proper water flow and cleaning performance. Correct installation ensures ideal water circulation, helping your pool stay clean and clear. Make sure everything is tight before using your cleaner again. Additionally, understanding the importance of proper maintenance can extend the lifespan of your equipment and ensure optimal performance.
Repairing or Replacing Seals and Gaskets
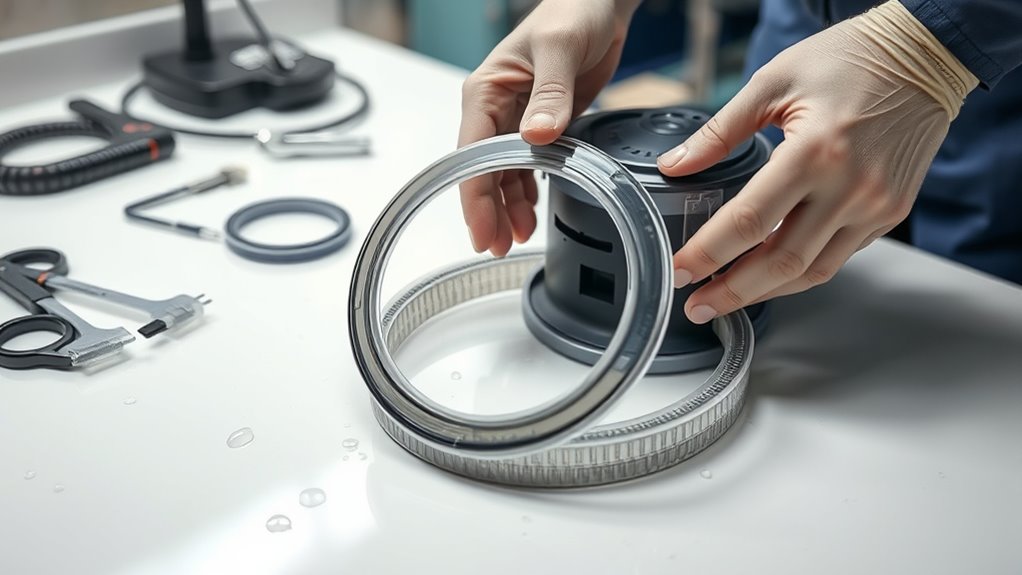
Seals and gaskets are critical for maintaining your suction pool cleaner’s suction power and preventing leaks. Regular seals inspection helps identify wear or damage early, ensuring your cleaner functions efficiently. When you notice a drop in suction or leaks, gasket replacement might be necessary. To repair or replace these parts:
Regular seal and gasket inspections ensure optimal suction and prevent leaks in your pool cleaner.
- Carefully remove the old seal or gasket without damaging surrounding components
- Clean the surface thoroughly before installing new parts
- Check for cracks or deformities during seals inspection
- Ensure the new gasket fits snugly and creates a proper seal
Proper gasket replacement guarantees a tight seal, preventing water leaks and maintaining suction. Always use compatible parts and follow manufacturer instructions for best results. Regular maintenance keeps your pool cleaner running smoothly.
Maintaining and Replacing the Pool Skimmer Plate
Regularly maintaining and replacing your pool skimmer plate helps guarantee your cleaner operates efficiently and prevents water leaks. During routine pool maintenance, check the skimmer plate for cracks, warping, or damage. If you notice any issues, replacing the plate ensures ideal water flow and keeps debris from bypassing the skimmer. A well-maintained skimmer plate also reduces strain on your suction pool cleaner. When upgrading equipment, consider a newer, more durable skimmer plate designed for better performance and longevity. Proper maintenance involves cleaning the plate regularly and inspecting it for signs of wear. Swapping out an old or damaged skimmer plate is a simple yet effective way to prolong your pool’s lifespan and improve overall cleaning efficiency.
Tips for Proper Reassembly and Testing
Ensuring proper reassembly and thorough testing are crucial steps to guarantee your suction pool cleaner functions correctly after maintenance. Proper reassembly helps maintain effective pool cleaning and extends equipment longevity. Before testing, double-check that all parts are securely fitted and aligned correctly.
Remember to:
- Inspect seals and connections for leaks or misalignment
- Run the cleaner in a controlled area to observe performance
- Check for unusual noises or vibrations
- Ensure suction power is consistent
Performing these steps ensures your pool cleaning equipment works efficiently and lasts longer. Neglecting proper reassembly can lead to decreased performance or damage, affecting your pool’s cleanliness. Take your time during reassembly and testing to avoid future issues and maximize your equipment’s lifespan.
Frequently Asked Questions
How Often Should I Replace Parts on My Suction Pool Cleaner?
You should inspect your suction pool cleaner regularly and follow a maintenance schedule to keep it running smoothly. Typically, replace parts like brushes and hoses every 6 to 12 months, or sooner if you notice issues. Use troubleshooting tips to identify worn or damaged parts early, preventing bigger problems. Consistent maintenance helps extend your cleaner’s lifespan and guarantees peak performance, saving you time and money in the long run.
Can I Upgrade Parts for Better Cleaning Performance?
Imagine your pool cleaner gliding effortlessly, debris vanishing like magic. You can definitely enhance its performance with upgrades, but guarantee part compatibility first. Performance upgrades might include more efficient brushes or advanced filters that boost cleaning power. Before installing, check if the new parts fit your model, so you avoid any mishaps. Upgrading thoughtfully lets your cleaner work smarter, giving your pool that pristine shine with less effort.
Are There Safety Precautions When Replacing Pool Cleaner Parts?
When replacing pool cleaner parts, safety’s key. You should always follow chemical safety guidelines to avoid skin or eye irritation from pool chemicals. Additionally, take electrical precautions by turning off the power supply before starting repairs to prevent shocks. Use proper tools and wear gloves for extra protection. Never rush the process; double-check that all parts are securely installed to keep your pool safe and clean.
What Tools Are Recommended for Replacing Suction Pool Cleaner Components?
Imagine you’re about to tackle a pool cleaning upgrade—what tools do you grab? For replacing suction pool cleaner components, you’ll want a reliable tool kit with screwdrivers, pliers, and possibly a wrench. These tools help you handle replacement parts efficiently and safely. Having the right tools ready guarantees your task goes smoothly, avoiding damage and making sure your cleaner works perfectly again. Always choose quality tools for lasting results.
How Do I Identify Compatibility of Replacement Parts With My Cleaner Model?
To identify compatibility of replacement parts with your cleaner model, start with model identification. Check your cleaner’s manual, label, or serial number for details. Once you have that information, compare it with the specifications listed on the parts packaging or manufacturer’s website. This guarantees part compatibility and assures proper fit and functionality. Always double-check model numbers and descriptions before purchasing to avoid compatibility issues.
Conclusion
Think of your pool cleaner as a trusty steed. When parts wear out, it’s like replacing worn shoes or tightening a loose saddle—your cleaner can gallop smoothly again. By swapping out hoses, brushes, or seals, you’re tending to its health, ensuring it’s ready for the next ride. Keep it well-maintained, and your pool’s cleaning journey will be a smooth trail, letting you enjoy pristine waters without a hitch.