To replace worn parts on your robotic pool cleaner, first identify signs like decreased suction, unusual noises, or visible cracks. Turn off and unplug the device, then carefully access internal components by removing the casing. Swap out worn brushes, filters, wheels, belts, or motors with compatible replacements, ensuring everything is secured correctly. Reassemble the cleaner and test it to confirm proper operation. If you follow these steps, you’ll learn how to keep your cleaner performing at its best.
Key Takeaways
- Identify signs of wear such as decreased suction, cracks, frayed brushes, or unusual noises to determine which parts need replacement.
- Power off and unplug the cleaner before removing the casing and accessing internal components for inspection.
- Replace worn brushes, filters, belts, and wheels by carefully detaching old parts and securely installing new ones.
- Check and adjust the alignment and tension of belts and tracks, and lubricate moving parts if recommended.
- Reassemble the device, run a test cycle, and verify proper operation to ensure successful part replacement.
Identifying Signs of Wear and Tear
To keep your robotic pool cleaner functioning effectively, it’s essential to recognize the signs of wear and tear early on. During regular pool maintenance, pay close attention to how well your robotic parts perform. If you notice decreased suction, uneven cleaning, or persistent obstructions, these are signs that some components may be worn out. Look for cracks, frayed brushes, or loose connections, as these indicate aging parts that need replacement. Unusual noises or the cleaner getting stuck more often also signal problems. Addressing these issues promptly helps prevent further damage and keeps your device working efficiently. Staying alert to subtle changes ensures you catch wear early, extending your robotic cleaner’s lifespan and maintaining ideal pool cleanliness. Regular inspections and understanding wear and tear signs can help you identify problems before they escalate. Recognizing deteriorating parts early can save you time and money on repairs. Additionally, consulting your device’s manual for specific component lifespan guidelines can help you plan timely replacements. Incorporating preventive maintenance practices can further enhance the longevity of your robotic cleaner.
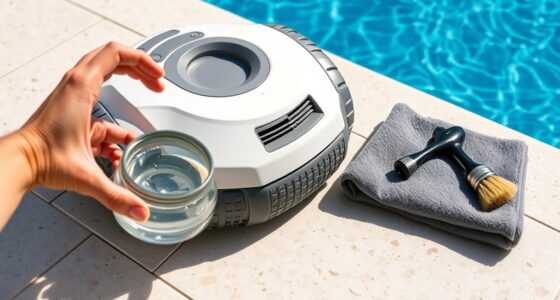
Gathering Necessary Tools and Replacement Parts
Before starting, make sure you have a tools checklist handy to gather everything you need. Check your replacement parts inventory to confirm you have the correct items on hand. Having everything ready guarantees a smooth and efficient repair process. Additionally, reviewing paint sprayer accessories can provide insights into compatible components and tips for maintenance and upgrades if you’re considering further enhancements. To ensure compatibility and optimal performance, reviewing Kia Tuning options can also offer useful guidance for selecting the right parts and modifications. For example, understanding suction power and filtration systems can help you choose the most effective components for your pool cleaner.
Tools Checklist
Gathering the right tools and replacement parts is essential for a smooth repair process. Before you begin, review your maintenance schedule to determine when parts need replacing and make certain you have the correct items on hand. A well-stocked tools checklist might include screwdrivers, pliers, a wrench, and a cleaning brush. Having these tools ready helps you follow troubleshooting techniques efficiently, avoiding delays. Double-check that you have compatible replacement parts to match your robotic pool cleaner’s model. Taking the time to gather everything beforehand minimizes interruptions and ensures you can work methodically. Proper organization and preparation are key to a successful repair, especially when addressing toilet maintenance issues that can arise unexpectedly. Additionally, understanding your remote work setup can facilitate a more focused and efficient repair process, especially if you need to coordinate with support or access online resources. Once you have everything, you’re ready to proceed confidently with replacing worn parts.
Replacement Parts Inventory
As you prepare to replace worn parts on your robotic pool cleaner, assembling a complete inventory of the necessary tools and replacements keeps the process efficient. Review your maintenance schedule to identify parts needing replacement. Check your warranty coverage to ensure free or discounted replacements. Gather essential items like filters, brushes, and drive belts. Keep spare parts on hand to minimize downtime. Use the table below to organize your inventory:
| Part | Quantity | Notes |
|---|---|---|
| Replacement filters | 2-3 | For regular cleaning |
| Drive belts | 1-2 | Check for wear |
| Brushes | 2 | Replace if worn |
| O-rings | 5 | Maintain watertight seal |
| Scraper blades | 2 | For tough debris |
Having these ready helps streamline the replacement and keeps your cleaner performing at its best. Regular inspections can help identify wear and tear early, preventing more serious issues. Additionally, understanding cookie categories can help ensure your online privacy preferences are correctly managed during this process. Implementing predictive analytics can further assist in anticipating part failures before they occur. A thorough inventory also allows you to plan ahead for replacement parts and avoid unexpected interruptions in your pool maintenance routine. Proper inventory management ensures efficiency and readiness for maintenance tasks.
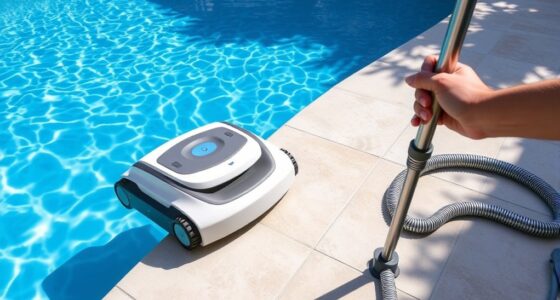
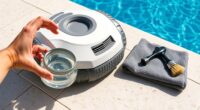
Removing the Robotic Pool Cleaner From the Pool

Wondering how to safely remove your robotic pool cleaner from the water? Follow these steps to guarantee smooth pool cleaning and robot maintenance.
- Turn off the power supply and unplug the robot to prevent any electrical hazards.
- Lift the cleaner from the pool, supporting its body to avoid dropping or damaging parts.
- Gently detach the cable, keeping it untangled for future use.
- Place the robotic cleaner on a flat surface for inspection or maintenance.
- Proper handling during removal helps prevent component damage and extends the robot’s lifespan.
- Regularly inspecting the waterproof casing and other parts can help identify potential issues early on, especially as technology advances improve durability.
- Always handle your robot carefully, especially during removal, to avoid damaging it. Removing the cleaner properly helps maintain its longevity and ensures effective pool cleaning and optimal performance.
- Being aware of the soulmate angel numbers can also serve as a reminder to stay positive and receptive to new connections, which can be beneficial in both personal and relationship growth.
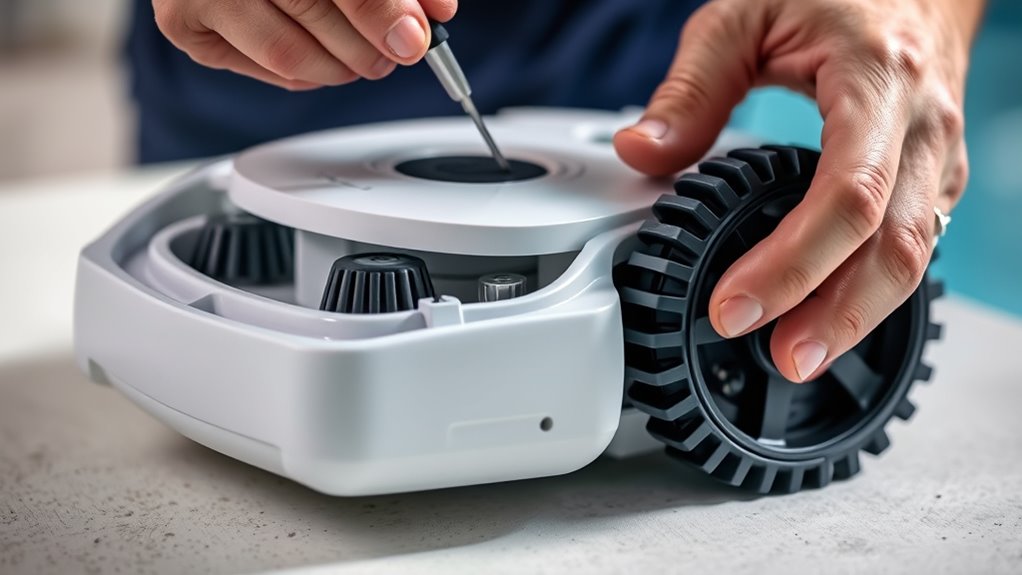
Accessing the Internal Components

To access the internal components of your robotic pool cleaner, start by carefully removing the casing or cover that protects the electronics and motor. Once open, you can inspect the battery for signs of wear or corrosion, which is essential for proper battery maintenance. Handling the internal parts gently prevents damage. While inside, check for any loose wires or debris that could affect performance. This is also a good time to ensure your software is up to date—some models require internal updates that improve efficiency or add features. Follow the manufacturer’s instructions to access the software update port or interface. Always disconnect the power before working inside to avoid electrical hazards. Properly accessing and maintaining these components guarantees your cleaner runs smoothly and lasts longer.
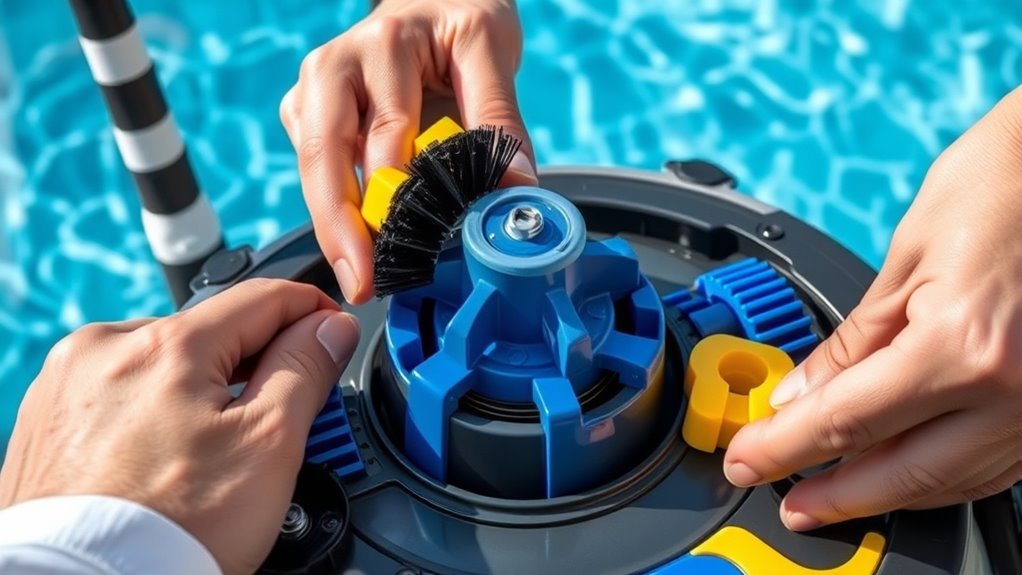
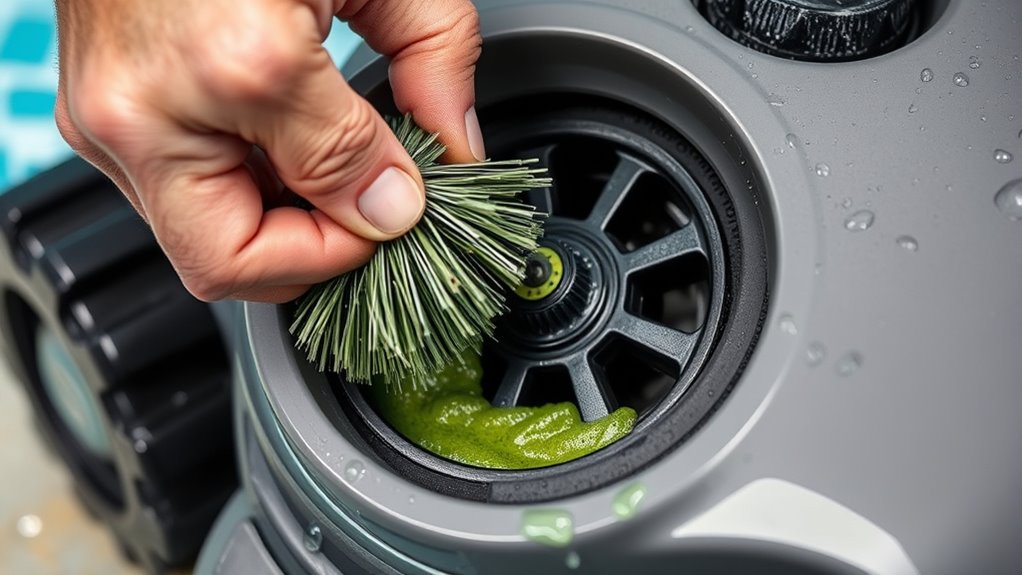
Replacing the Brushes and Scrubbing Pads

Replacing the brushes and scrubbing pads is a straightforward process that guarantees your robotic pool cleaner continues to scrub and vacuum effectively. Regular brush maintenance and scrubbing pad replacement ensure peak cleaning performance. To do this:
- Turn off the cleaner and remove it from the pool.
- Detach the worn brushes and scrubbing pads according to your model’s instructions.
- Clean the brush attachments and inspect for damage.
- Attach new brushes and scrubbing pads, making sure they’re securely in place.
This simple step keeps your cleaner working efficiently and prevents unnecessary wear. Remember to check the brushes and pads regularly, replacing them when they show signs of wear or buildup. Proper brush maintenance prolongs your cleaner’s lifespan and maintains its cleaning power.
Swapping Out the Filters and Filter Cartridges
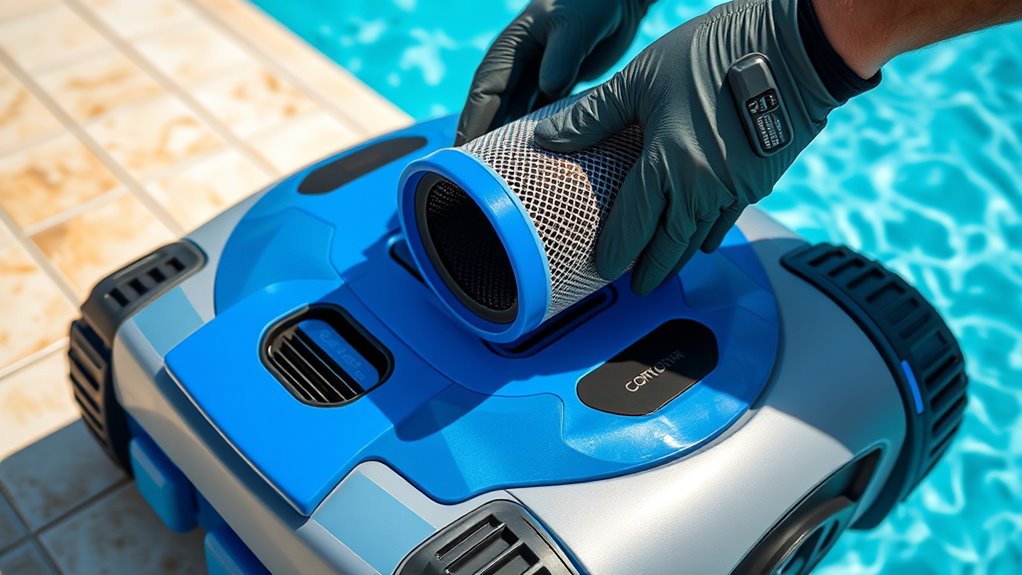
To keep your pool cleaner running smoothly, you’ll need to remove the old filters and replace them with new cartridges. Start by carefully taking out the worn filters, making sure not to damage any surrounding parts. Then, install the fresh cartridges securely to guarantee ideal filtration and performance.
Removing Old Filters
Before installing new filters, you need to remove the old ones to guarantee your robotic pool cleaner operates effectively. Proper filter maintenance ensures peak performance and prolongs the life of your device. Follow these steps for removal:
- Power off your cleaner and unplug it from the socket.
- Open the filter compartment, usually by releasing clips or latches.
- Carefully lift out the dirty filter or cartridge.
- Rinse the filter with water, following cleaning procedures to remove debris and dirt.
This process helps prevent clogs and maintains efficient cleaning. Regularly removing and cleaning filters reduces strain on the motor and improves overall maintenance. Always handle filters gently to avoid damage and ensure your cleaner performs at its best.
Installing New Cartridges
Are you ready to install new cartridges in your robotic pool cleaner? Proper cartridge installation is essential for effective robotic pool maintenance and guarantees your cleaner runs smoothly. First, turn off and unplug your pool cleaner to prevent accidents. Remove the old filter cartridges carefully, making sure not to damage the surrounding parts. Next, rinse the new cartridges with water to remove any manufacturing debris. Insert them firmly into the designated slots, ensuring they fit securely. Properly installed filters improve suction and cleaning efficiency, reducing pool cleaner troubleshooting issues. Regularly replacing and correctly installing cartridges keeps your robotic pool cleaner functioning at its best, saving you time and effort in pool maintenance. Follow these steps to keep your cleaner operating efficiently and extend its lifespan.
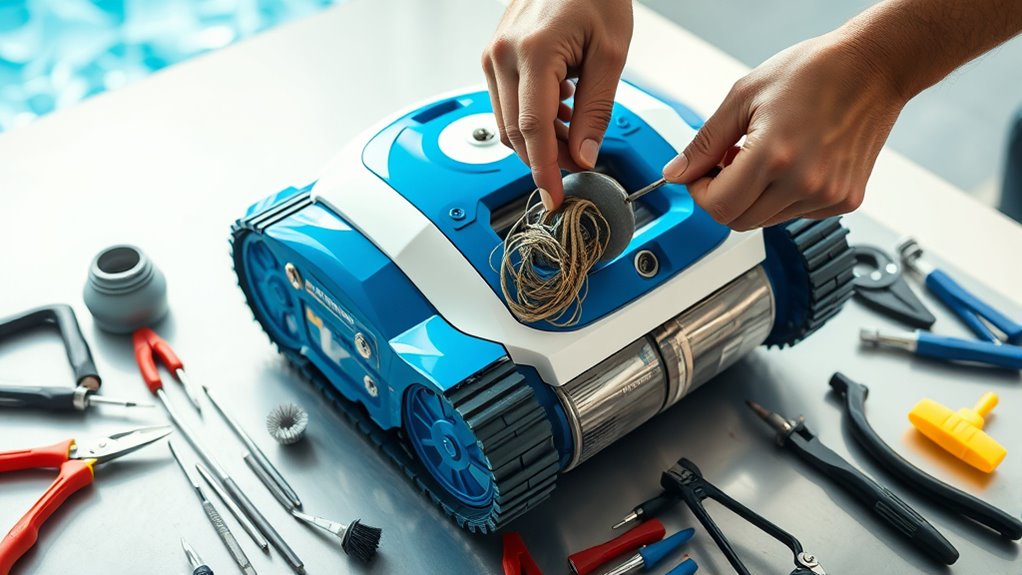
Replacing Damaged or Worn Wheels and Tracks
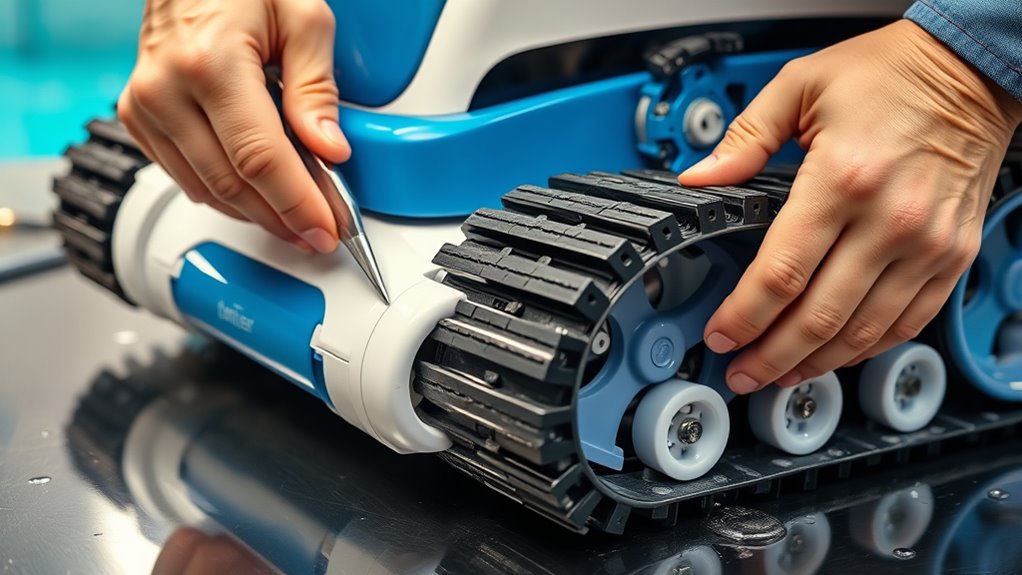
Wheels and tracks are essential for your robotic pool cleaner’s mobility, so replacing damaged or worn parts promptly keeps it running smoothly. If you notice slipping or uneven movement, it’s time for substitution. To do this effectively:
- Inspect wheels and tracks for cracks or excessive wear.
- Remove fasteners and carefully detach damaged parts.
- Check track alignment and adjust if necessary to ensure smooth operation.
- Perform wheel maintenance, cleaning debris and lubricating moving parts if recommended.
Regular wheel maintenance helps extend their lifespan, while proper track alignment prevents unnecessary strain. Replacing worn wheels and tracks restores ideal traction and mobility, ensuring your cleaner operates efficiently. Keep an eye on these components to avoid bigger issues down the line.
Checking and Replacing the Drive Belts and Motors
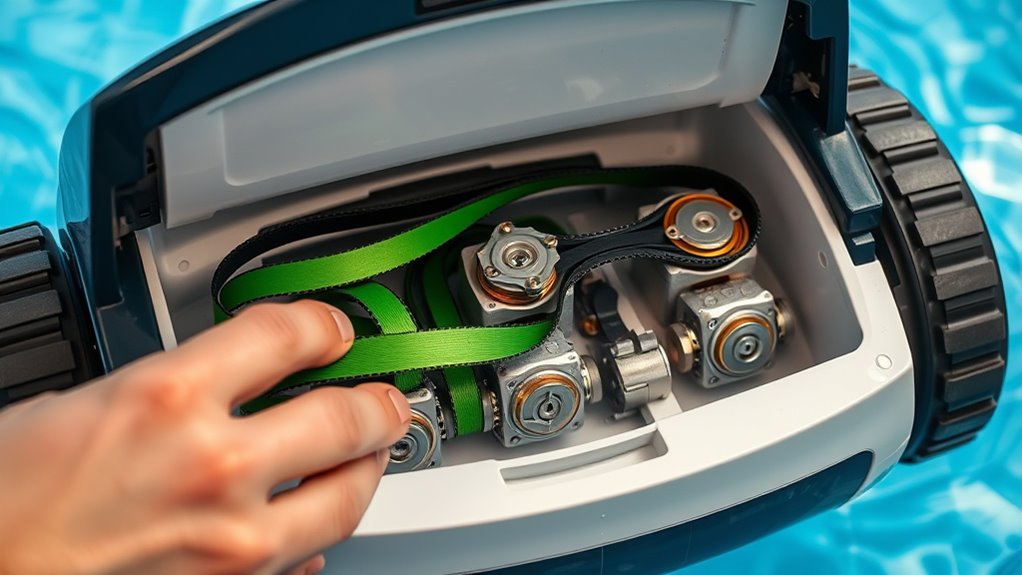
Since drive belts and motors are critical for your robotic pool cleaner’s movement, regularly checking their condition is essential for reliable operation. Start with a drive belt inspection to spot cracks, fraying, or slack that could hinder performance. If the belt shows signs of wear, replace it promptly. For the motor, perform troubleshooting by listening for unusual noises or testing voltage if accessible. A faulty motor can cause the cleaner to stall or move erratically. Use the table below to guide your checks:
| Component | Action |
|---|---|
| Drive Belt | Inspect for damage; replace if worn |
| Motor | Test for proper function; troubleshoot issues |
| Overall Performance | Confirm smooth operation after replacements |
Keeping these parts in check ensures your cleaner runs efficiently.
Reassembling and Testing the Robotic Pool Cleaner
After replacing worn parts, carefully reassemble the robotic pool cleaner by securing all components firmly in their correct positions. Check that all screws and clips are tight, ensuring the device is stable. Once assembled, power it on and follow the user manual’s instructions for initial setup. Test the wireless connectivity by connecting the cleaner to your app or remote control, confirming it responds properly. Make sure the sensors and brushes move smoothly without obstruction. Run the cleaner through a short cycle to verify proper operation. Observe its navigation and cleaning performance, adjusting settings if necessary. Verify that the device communicates seamlessly with your network and that all features function correctly. Proper reassembly and testing ensure your robotic pool cleaner operates efficiently and reliably.
Frequently Asked Questions
How Often Should I Replace Parts on My Robotic Pool Cleaner?
You should follow your robotic pool cleaner’s maintenance schedule to guarantee it works efficiently. Typically, parts like brushes and filters need replacement every 6 to 12 months, depending on usage and part lifespan. Regularly inspecting your cleaner helps identify worn components early. By staying proactive with maintenance, you extend your device’s lifespan and avoid costly repairs, keeping your pool sparkling and your cleaner running smoothly.
Can I Replace Parts Myself or Should I Hire a Professional?
You can definitely try a DIY repair if you’re comfortable, but for complex issues or safety concerns, professional servicing is the best choice. Replacing worn parts on your robotic pool cleaner is straightforward for simple tasks, yet some repairs require specialized tools and expertise. If you’re unsure, hiring a professional guarantees proper installation and avoids damage, giving you peace of mind and prolonging your cleaner’s lifespan.
Are There Compatible Replacement Parts for Different Robotic Pool Cleaner Brands?
Replacing parts on your robotic pool cleaner is like finding the right puzzle piece; it can be tricky. You’ll want to check for brand compatibility and part interchangeability to guarantee the new parts fit and function properly. Many brands offer compatible replacement parts, but always verify specifications and compatibility guides. Doing a bit of research helps you avoid mismatched components, keeping your cleaner running smoothly without needing professional help.
What Safety Precautions Should I Take During Replacement?
When replacing parts, you should prioritize electrical safety by unplugging the cleaner before starting. Always use proper tools to avoid injury or damage, and work in a well-lit, dry area to prevent electric shock. Wear gloves if needed, and handle components carefully. Double-check that all connections are secure before powering the device back on. These precautions help guarantee your safety during the replacement process.
How Do I Dispose of Old or Damaged Parts Properly?
They say, “One man’s trash is another man’s treasure,” so you should eco-friendly dispose of old or damaged parts. Check local recycling options for electronic waste or plastic components, and consider taking parts to designated recycling centers. Avoid throwing them in regular trash, as this can harm the environment. Proper disposal helps reduce waste and supports sustainability, making sure your pool cleaner’s parts are disposed of responsibly.
Conclusion
With a few simple steps, you’ve given your robotic pool cleaner a fresh set of wings to soar through your pool once again. Like tuning a finely crafted instrument, replacing worn parts restores harmony and efficiency to its dance. Now, as it glides smoothly across the water’s surface, you can enjoy sparkling cleanliness, knowing you’ve kept its heart beating strong. Your DIY care transforms it into a tireless swimmer, ready to conquer the depths anew.