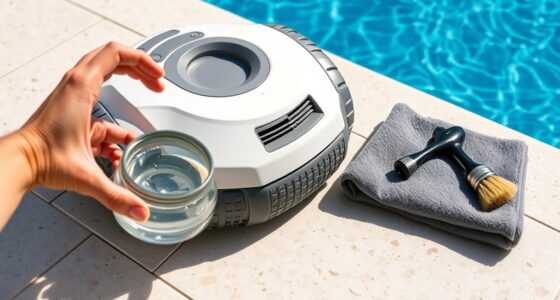
If your automatic pool cleaner isn’t working well, start by checking it’s plugged in and getting power. Look over the brushes for wear and clear any debris from pathways, skimmer, and intake valves. Test the wheels and drive motor, making sure they move smoothly. Finally, clean or replace filters to keep water flowing properly. Following these steps can solve common issues—keep going to discover more tips to get your cleaner back in top shape.
Key Takeaways
- Verify the cleaner is plugged in, receiving power, and the outlet functions properly before troubleshooting further.
- Check brushes for wear and pathways for debris to ensure optimal movement and cleaning efficiency.
- Inspect skimmer and intake valves for clogs or obstructions, clearing them to maintain proper water flow.
- Test the drive motor and wheels for proper alignment and operation, ensuring smooth movement.
- Regularly clean filters and remove debris to prevent clogs and optimize the cleaner’s performance.
Checking the Power and Connections
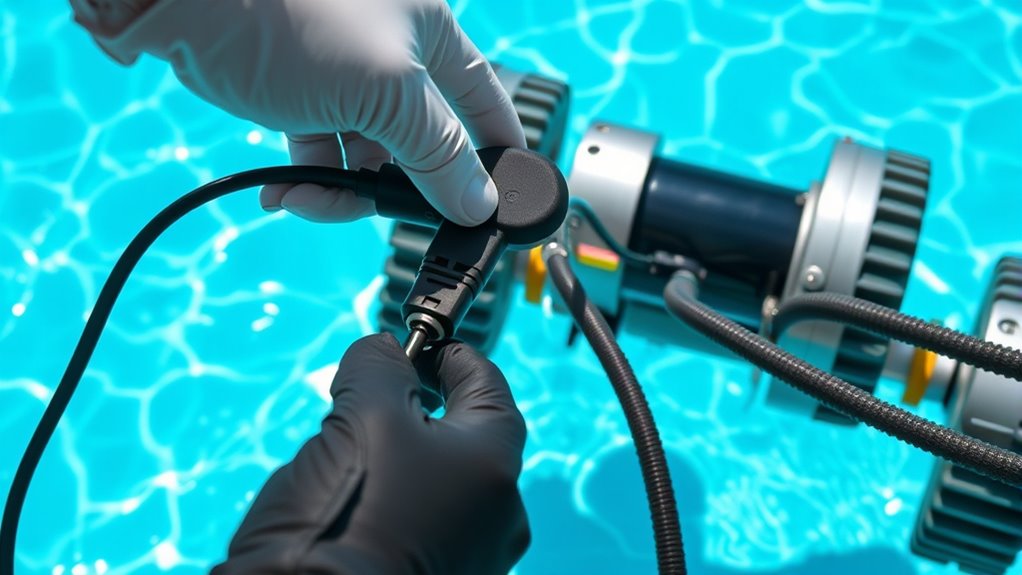
Have you checked if your automatic pool cleaner is properly plugged in and receiving power? Start by inspecting the power source to make certain it’s functioning correctly. Make sure the outlet has power by testing it with another device. Then, examine the electrical connections between the power cord and the cleaner, ensuring all plugs are secure and free of corrosion or damage. Loose or faulty connections can prevent your cleaner from operating properly. If you’re using an extension cord, verify it’s rated for outdoor use and in good condition. Sometimes, simply unplugging and replugging the unit can resolve minor connection issues. Confirm that the power switch on the cleaner itself is turned on. Properly secured electrical connections and a reliable power source are essential for your automatic pool cleaner to work effectively.
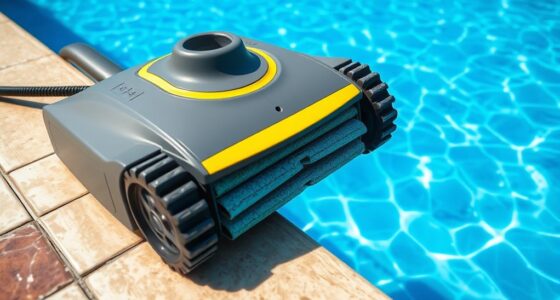
Inspecting the Brushes and Brushes Pathways
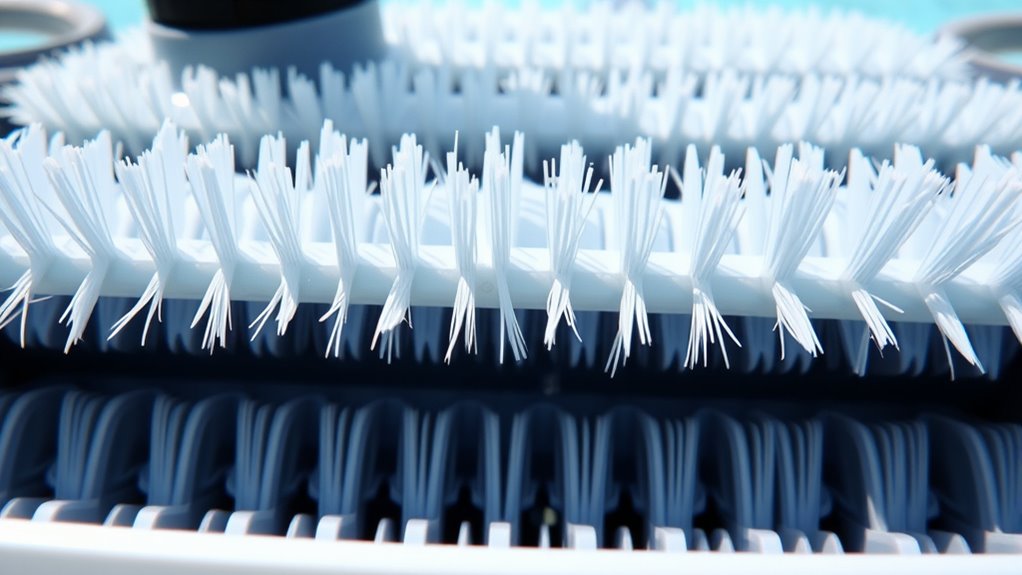
To guarantee your automatic pool cleaner operates smoothly, you need to inspect the brushes and their pathways regularly. Check the brushes for signs of brush wear, such as fraying or uneven bristles, which can reduce cleaning effectiveness. If the brushes are worn out, replace them promptly. Next, examine the pathways for blockages, such as debris or algae buildup, that can hinder movements. Clear any obstructions to ensure the cleaner moves freely across the pool surfaces. Pay close attention to the pathways around the brushes, as blockages here can cause the cleaner to miss spots or work harder than necessary. Regular inspections help maintain peak performance and extend the lifespan of your automatic pool cleaner. Additionally, understanding the brush wear process can help you anticipate when replacements might be needed before performance declines. Incorporating routine maintenance checks can prevent minor issues from becoming costly repairs later on.
Examining the Skimmer and Intake Valves
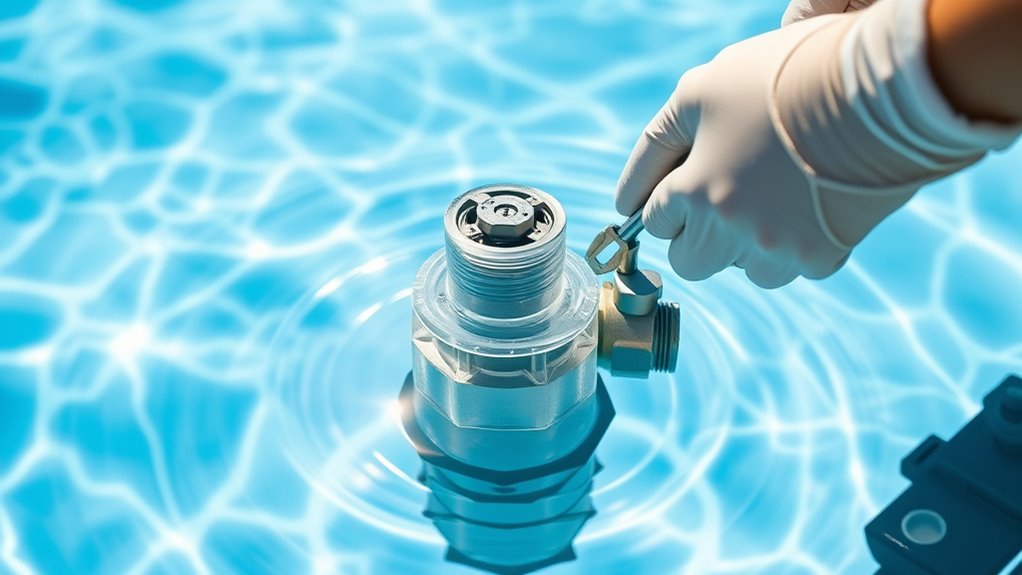
Regularly examining the skimmer and intake valves guarantees your pool cleaner functions effectively. Start by inspecting the skimmer basket; ensure it’s not clogged with leaves or debris, which can restrict water flow. A full or blocked skimmer basket reduces suction, impairing cleaning performance. Next, check the intake valve for any obstructions or debris that might hinder water flow into the cleaner. Clear out any debris or buildup to maintain proper suction. Make sure the valves are fully open and functioning smoothly. If you notice any leaks or damage, replace or repair the valves promptly. Maintaining proper water flow is crucial for efficient pool cleaner operation and can help prevent system failures. Proper valve operation ensures consistent water pressure, which is essential for optimal cleaning results. Keeping these components clean and in good condition assures your pool cleaner operates efficiently and prevents unnecessary strain on the system. Additionally, understanding how pool cleaner operation relies on proper water flow can help you troubleshoot issues more effectively. Regular maintenance of these parts also contributes to home maintenance longevity and optimal performance.
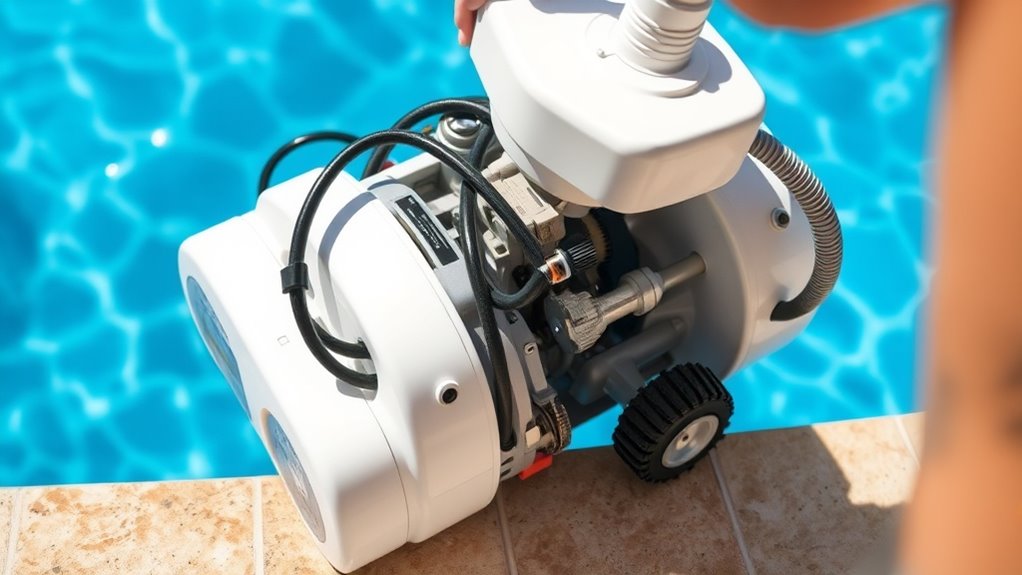
Testing the Drive System and Wheels
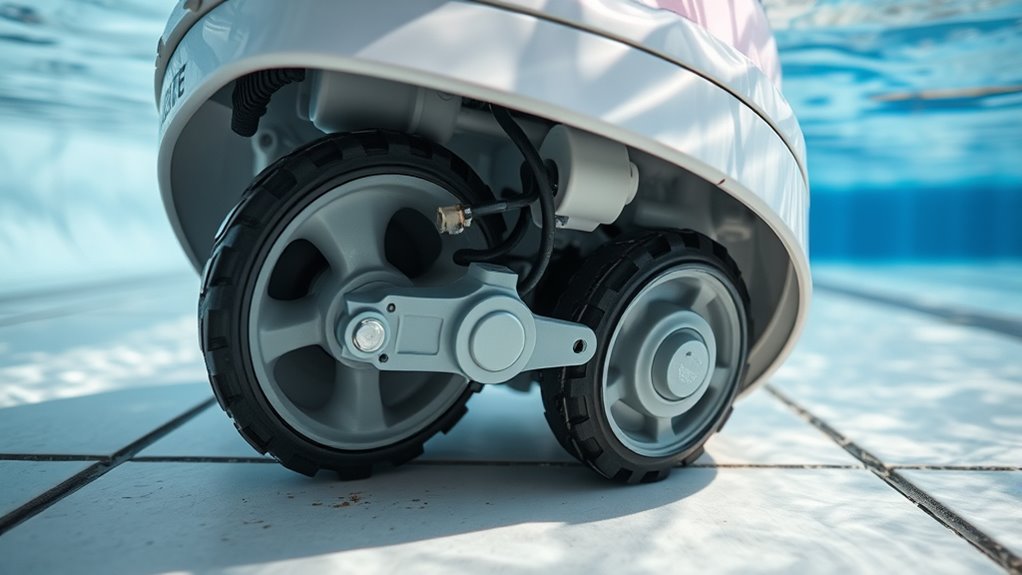
After ensuring your skimmer and intake valves are clear and functioning properly, it’s time to verify the drive system and wheels. Start by inspecting the drive motor for signs of wear or damage, ensuring it runs smoothly without unusual noises. Next, check the wheel alignment; misaligned wheels can cause the cleaner to stall or deviate from its path. Make sure the wheels spin freely and are securely attached. If you notice any wobbling or resistance, adjust the alignment or replace damaged wheels. Test the drive motor by manually activating the cleaner, observing its movement. Properly aligned wheels and a functioning drive motor are essential for efficient operation. Addressing issues here can resolve many common automatic pool cleaner problems.
Clearing Obstructions and Cleaning the Filter System
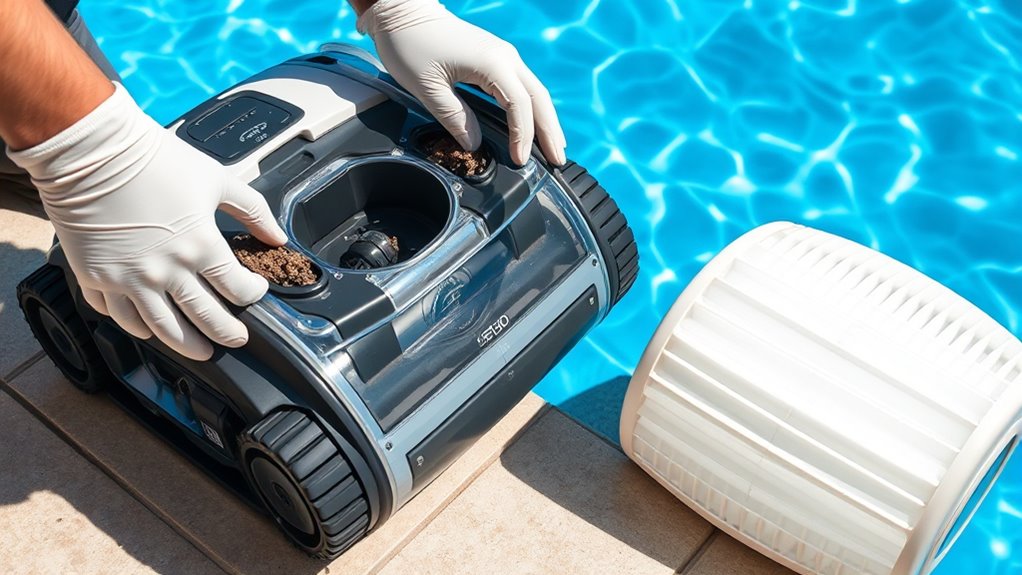
Obstructions in the pool or its filtration system can considerably hinder your automatic cleaner’s performance. Debris accumulation on the cleaner or inside the filter can cause blockages, reducing efficiency. To clear obstructions, check the cleaner’s intake and brushes for tangled leaves, hair, or dirt, and remove any debris. Regular filter maintenance is essential: remove the filter cartridge, rinse it thoroughly with a hose, and replace it if it’s worn or damaged. Clean filters guarantee proper water flow, which improves cleaning and prevents strain on your device. Additionally, using Volkswagen Tuning techniques such as upgrading the filtration system can enhance overall water circulation. Improving water flow efficiency can also help prevent future clogs and streamline cleaning. Upgrading components like the pump or filter can provide better hydrodynamics, ensuring smoother operation and less frequent blockages. Incorporating data-driven strategies for routine maintenance can help you identify potential issues before they cause significant problems. Paying attention to clog prevention measures, such as timely cleaning, can significantly extend your cleaner’s lifespan. Keep an eye out for clogs or buildup that can impede movement. Consistent cleaning and maintenance of the filter system not only extend your cleaner’s lifespan but also keep your pool sparkling clean.
Frequently Asked Questions
How Often Should I Replace My Pool Cleaner’S Brushes?
You should replace your pool cleaner’s brushes every 6 to 12 months to guarantee peak performance. Regular brush replacement helps maintain the cleaner’s effectiveness and extends its lifespan. Keep an eye on wear and tear, and if brushes look frayed or worn, swap them out sooner. Proper brush maintenance is key to maximizing your cleaner’s lifespan and cleaning efficiency, saving you time and money in the long run.
Can Temperature Affect the Cleaner’S Performance?
The pool temperature can dramatically affect your cleaner’s efficiency, like a roller coaster ride you didn’t sign up for. Cooler water slows down the motor, reducing cleaning power, while warmer water can cause parts to wear out faster. If your pool’s temperature fluctuates, expect your cleaner to struggle or work less effectively. Keep an eye on the temperature to help your cleaner perform at its best and avoid unnecessary repairs.
Is There a Way to Reset the Cleaner’S System?
If you’re wondering how to reset your automatic pool cleaner’s system, it’s simple. Most models have a dedicated reset button or a specific sequence of power cycles to perform a system reset. Consult your user manual for troubleshooting tips, as procedures can vary. Resetting often helps resolve minor glitches, improving performance. Don’t forget to turn off the power before resetting to avoid damage, and check if the issue persists afterward.
What Should I Do if the Cleaner Is Making Unusual Noises?
Imagine your pool cleaner humming with a noisy motor, like a restless bee. First, turn it off and inspect for debris blockage around the brushes and impellers. Clear out any tangled leaves or dirt that might be causing the noise. If the sound persists, check for loose parts or worn-out components. Regular maintenance keeps your cleaner running smoothly, preventing those strange noises from disrupting your pool time.
How Do I Program the Cleaner for Different Pool Sizes?
To program your pool cleaner for different pool sizes, start by adjusting the pool size setting in the programming options. Access the control panel or remote, then select the pool size adjustment feature. Input the correct size based on your pool’s dimensions, which helps optimize cleaning cycles. Next, review the programming settings to verify they match your desired cleaning schedule and coverage, guaranteeing efficient operation tailored to each pool size.
Conclusion
With a little patience and a keen eye, you can breathe new life into your pool cleaner, turning it from a stubborn obstacle into a smooth-operating marvel. Think of your efforts as tending to a garden—each fix is like watering a wilted flower, helping your cleaner bloom back to full strength. Soon, it’ll glide through your pool like a gentle current, leaving behind sparkling water and peace of mind, all thanks to your hands-on care.